The SafetySkills system offers 2 default user types, “Owner” and “Learner.” All other “User Types” will be created and managed by the administration team for the account.
For more information about each user permission please review this article: User Permissions
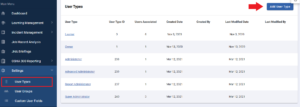
The “User Types” main page will provide some additional data about each user type. This includes the user type ID and the number of active users for each user type. The page also lists the created by and created date, as well as the last modified by and date for each user type.
Default User Types
The “Owner” is the top level user type in the system. This user type has access to all settings and features of the system. The person assigned this user type should be the main person who will be running the account. This person should also be the main contact for the SafetySkills Training Success Manager and SafetySkills Help Desk. When viewing the “User Type Permissions” page, all the available permissions are checked on. This allows the Owner to manage all aspects of the account.
Please note, the user type of “Owner” can only be assigned to one user profile. If you would like to have users that can act like an Owner you can create a custom user type with all permissions checked on and all user types added to the hierarchy settings.
The “Learner” is the most basic user type. This user has access to their personal dashboards, My Training page, and if utilizing SafetySkills Empower, the “My CAPAs” page, and the link to create a new incident report. If the profile has an email listed, then the individual user will setup their notification settings. They cannot access any other settings within the LMS. This includes editing their own profile data or email address. This must all be managed by the account’s administration team.
Custom User Types
- Create new user types:
- To create the first additional user type(s) in the account the Owner will need to access the Settings section of the menu than the “User Types” page
- Please note: once other user types have been created and assigned to profiles that have permissions to create or edit user types, those individuals will be able to follow these same instructions to add more user types or edit the existing user types
- To create a new user type, click on the blue “Add User Type” on the upper right of the page
- To create the first additional user type(s) in the account the Owner will need to access the Settings section of the menu than the “User Types” page

- On the pop-up type in the name for this user type. This can always be edited later
- Then click “Create”
- The sections of the page will align to the permissions outlined in the User Permissions article
- The “Default User” settings will already be selected and are not options that can be changed
- To select a permission simply click the check box to add viewing or modifying abilities
- If there are prerequisites for a permission that has been selected a pop-up will advise of the needed prerequisites
- Select the needed prerequisites and then click “Save” on the pop-up, or click the ‘x’ in the upper right corner to close the pop-up
- If removing a permission requires the removal of prerequisite permissions a pop-up will advise of the needed changes
- Deselect the needed prerequisites and then click “Save” on the pop-up, or click the ‘x’ in the upper right corner to close the pop-up
- If there are prerequisites for a permission that has been selected a pop-up will advise of the needed prerequisites
- If the settings will create a user type that needs to have additional user type hierarchy permissions established you will see the “Edit User Type Hierarchy” option in the “User Management” section of the page.
- Please note: the default “Owner” user type and any user type with the permission “Can Modify User Types” will be the only user types with dynamic access to all other user types. Any other user types that can modify users will need to have the hierarchy of managed uses types updated, as needed, when users types are added to the account.
- The hierarchy controls editing of the email and user type; creating users of different types; and resetting of passwords (if that permission has been added)

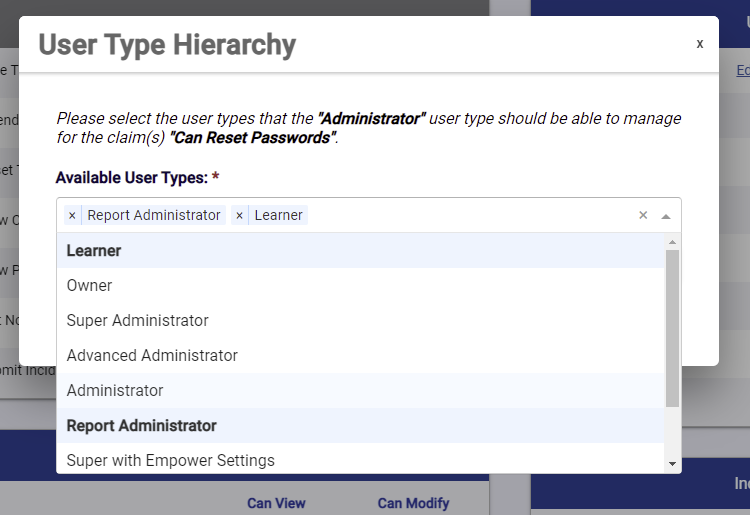
- Click on this link to access the pop-up to add the user types that this user type will be able to manage. The User Types assigned in the hierarchy will allow the following:
- If permissions have been given to modify users the email and “User Types” cannot be edited for User Type not in the hierarchy
- For example, the User Type below will be able to edit the emails and User Types for “Report Administrators” and “Learners” but not for a “Super Administrator” because they are not assigned that User Type in the hierarchy
- If the User Type being created has been given permission to reset passwords, that permission respects the hierarchy of User Type they were assigned
- For example, the User Type below will only be able to reset passwords for “Report Administrators” and “Learners”
- On this pop-up all current user types will be listed

- Also, managing a user type is not the same as having groups assigned to manage individual user groups. For more information about assigning groups to users that can only see “Managed Users,” please see How To Assign Administrators to Groups this article outlines the profile level setting needed for some users to view or edit specific groups of users in an account.
- Click on this link to access the pop-up to add the user types that this user type will be able to manage. The User Types assigned in the hierarchy will allow the following:
- Once the desired setting for the user type has been selected click the green “Save Change” button

- View and edit an existing user type:
- From the main menu, select the “Settings” option, then “User Types”
- To view the settings for a user type, click on the name of that user type
- This will load the settings page for the user type
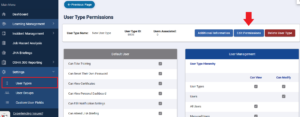
- If you have access to editing user types you will see the blue “Edit Permissions” button on the upper right
- Click this option to edit this user type

- Follow the steps outlined above to edit the user type
- Once all needed changes have been made, click the “Save Changes” button on the upper right
If you have an additional questions about User Types, user hierarchy, or anything else in this article please email the SafetySkills Help Desk at [email protected] or call 405-463-6656, option 2.
