To add a single user, you will go to the “Configure” tab (looks like two gears) in the right corner, and then down to “Add User.”

Fill out the required information (marked with a red asterisk) and any other fields that may have been added to the account. Notice you do not need to create a password for your users; they will create it when they login for the first time.
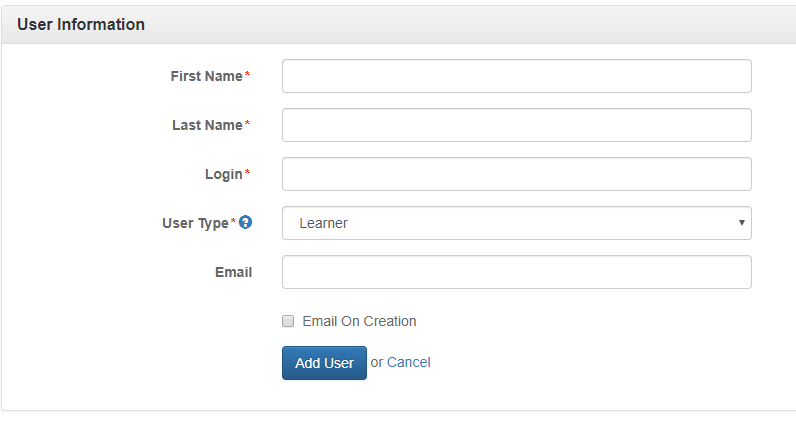
A user’s login must be at least three characters, and unique to that specific user. You may use their email address as their login if you wish, as well as any combination of letters and numbers. If you use leading zeros for a login, please be aware that exporting the user list to a CSV file will clear the leading zeros. You may read our article about preserving the leading zeros here: How to Preserve Logins that Contain Leading Zeros
If you want to use features such as sending welcome and assignment reminder emails, you will need to fill out the email addresses for each user. You cannot use duplicate emails for users since it would cause reporting errors, although you can use their email address as their login. If you would like the user to be notified that they can now login, click the box next to “Email on Creation.”
If your account owner has utilized custom fields, they will display to the right of the fields notated above. If they are required, they will be marked with a red asterisk as well.
When you are finished, click the “Add User” button. The user you created will now be displayed in the Users tab.