To create a new form, in the main menu select “Audits & Inspections” and click on the option “Forms – CAPA”. Then in the upper right hand corner click on the blue “Create New Form” button.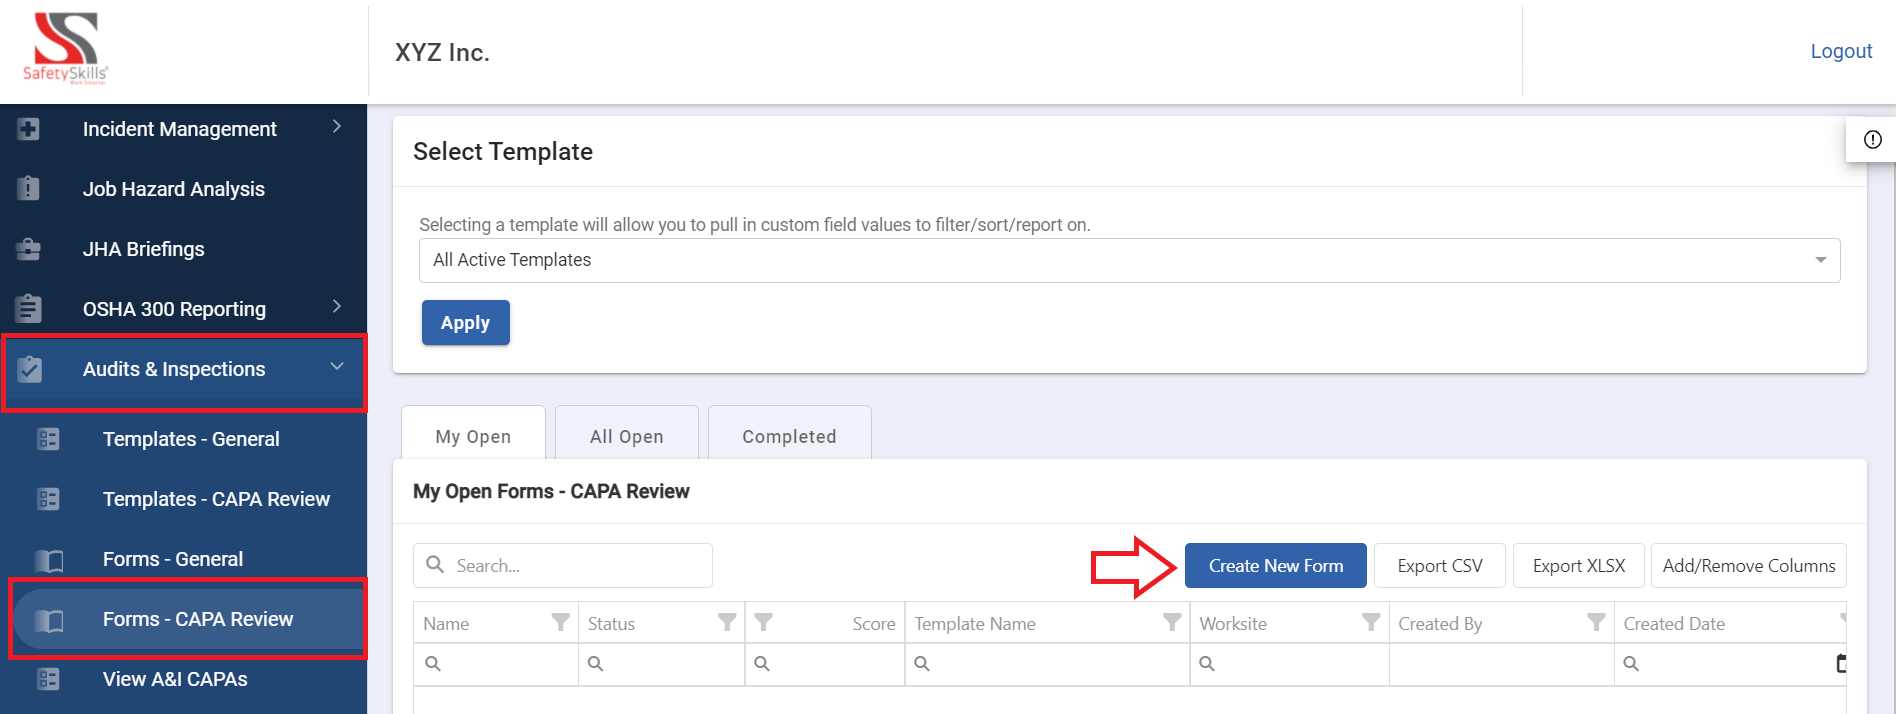
This will generate a pop-up for you to fill in the initial information.
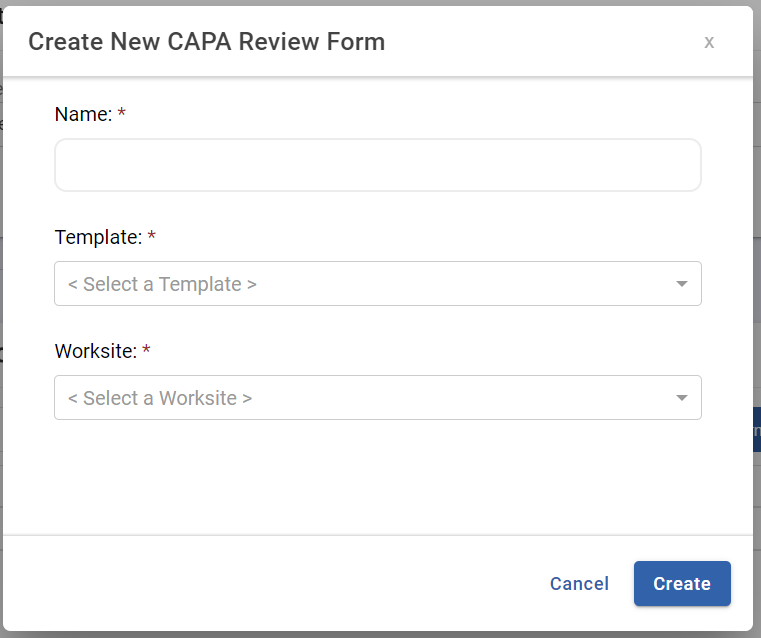
First, you will need to enter a unique name for your form. If you try to utilize a name of a form that has already been created an error will populate informing you to update the name you have selected.
Next, you will select the template that you would like to use. Please note that only Approved CAPA Review Templates will populate in this section for you to choose from.
In the final box of the pop up you will select the worksite.
After all of this is filled in click the blue “Create” button to proceed.

From here you can edit the details of the form and conduct your audit/inspection based on the instructions.
Based on the template you will be able to fill in any custom fields that were associated with the template, enter the inspection/audit date, and then move on to selecting the CAPAs you would like to audit or inspect.
To add a CAPA to inspect or audit, please click on the blue “Add Incident CAPAs” button or the blue “Add A&I CAPAs” button. The Incident CAPAs will bring up the CAPAs generated from Incident Cases while the A&I CAPAs will bring up the CAPAs generated from an A&I General Form. Please note that the CAPAs you see on these pages will be specific to the Worksite you selected when creating the Form. If you are looking for a CAPA that is associated with a different Worksite, you would either need to update the Worksite or create a new form in order to view these CAPAs.
![]()
![]()
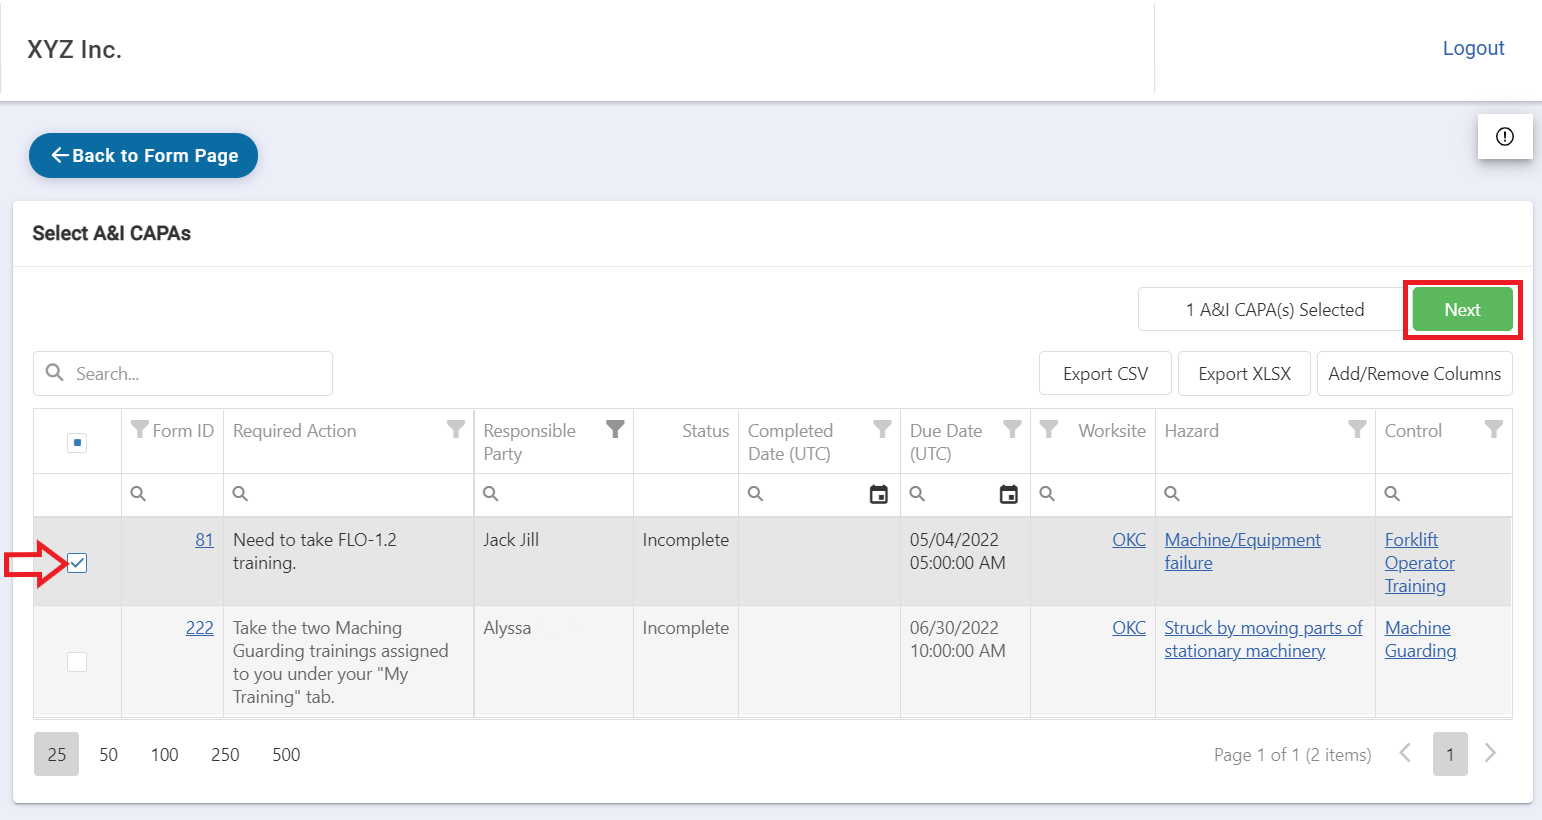
Once you have clicked an Add CAPA option you will be able to select the CAPAs you would like to inspect or audit and add those to your Form. You can add Incident CAPAs, A&I CAPAs, or both to the same form.
To choose the CAPA(s) you would like to audit or inspect check the box to the left of them. You can choose one or select multiple at one time. Once you are ready to add them to the Form click the green “Next” button. You will see these populate on your Form. You repeat these steps to add additional CAPAs at any point when you are filling out the CAPA Review Form.
For each CAPA selected for the CAPA Review Form you are going to fill out the respective “Yes” or “No” for the field “Resolved?”. If you select “No” you will be able to “Take Action” with the CAPA. From here you can modify the CAPA as needed.
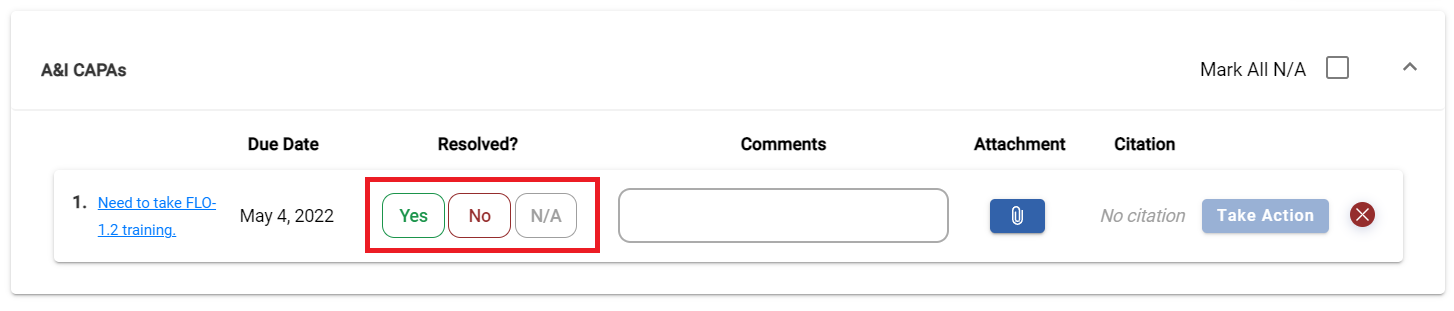
For each CAPA you will also be able to leave comments, add attachments, and view the citation if there was one associated with it. To view the citation, click the blue link and this will bring up the additional information.
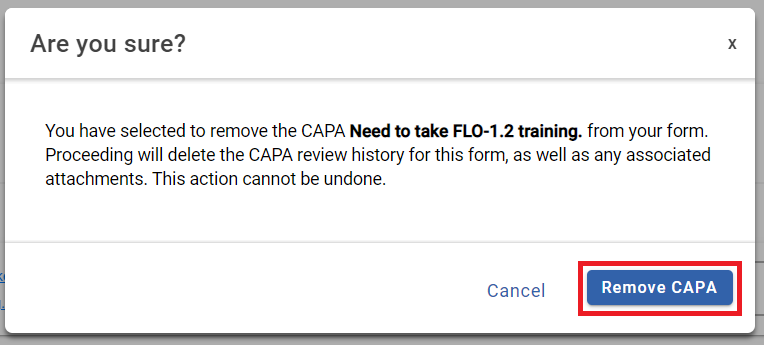
If there is any CAPA that has been added to the Form that you would like to remove, you can do this by clicking the red “X” button to the right. When you click this, you will be prompted with a pop-up to confirm if you would like to proceed with this action. If so, you will click the blue “Remove CAPA” button.
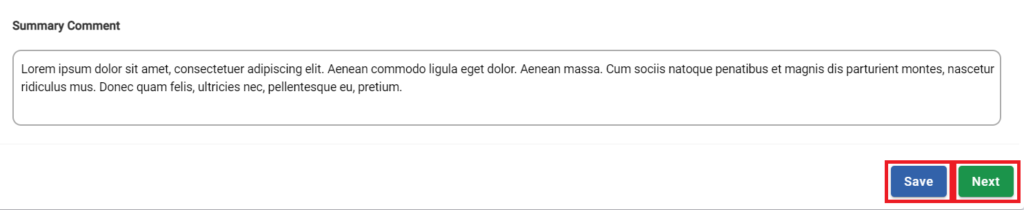
At the end there will be a Summary Comment that you can fill in as desired or indicated by the instructions of the template. This section is an open text box for you to write any additional information regarding the form that is not necessarily applicable to the CAPA(s) that were audited or inspected. You can edit the comment at any time as long as the form is open.
Once the form has been filled in you can click “Save” to keep your changes to the CAPA Review form. When all of the necessary items have been finished then the “Next” button will go from gray to green, and at this point you are able to select this to continue on in the form.
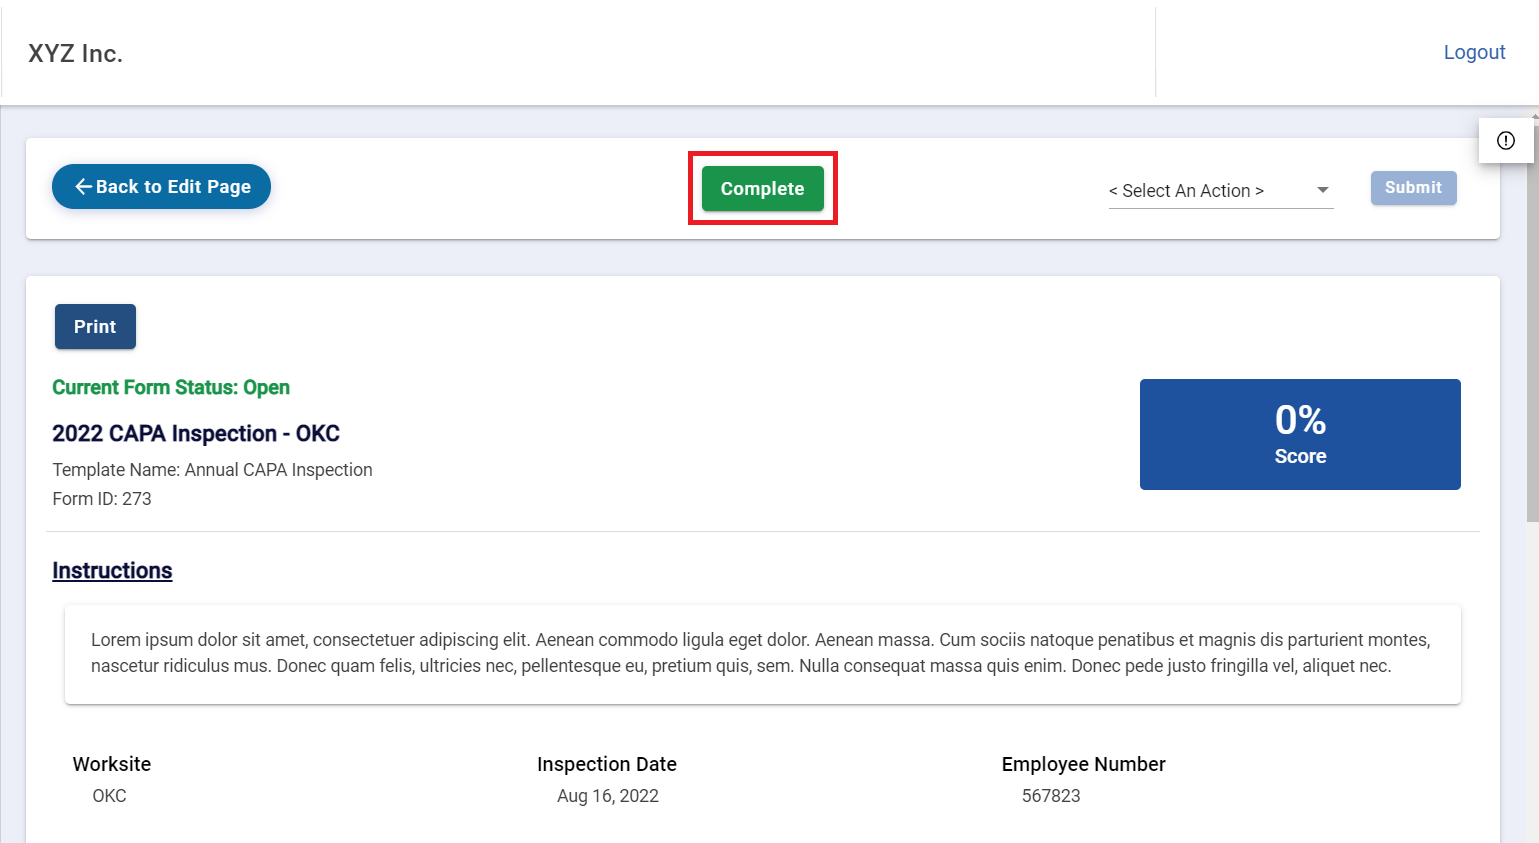
On the next page you will either be able to complete the form or submit it for approval. The options that appear here are determined by the settings of the template that you are utilizing.
If you see the option “Complete” you can click this button and this will complete the form. This will close out the form and you will have a review page with the details from your audit/inspection.
If you see the option “Submit for Approval” this means that the form needs to be reviewed before it is able to be closed.
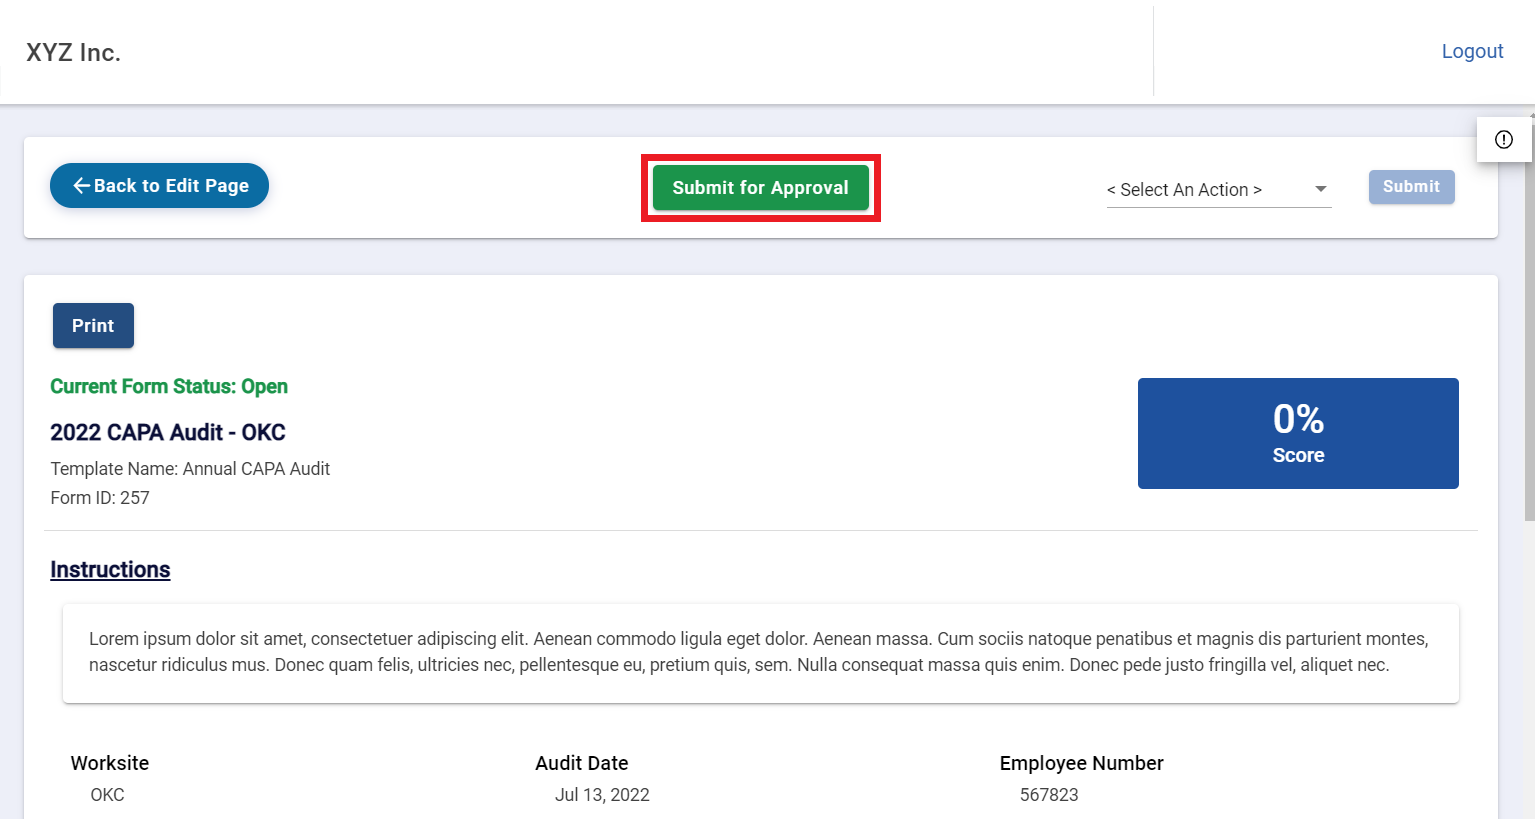
Once you click this button it will notify the correct contacts for your account that they need to review the form. From here that user will be able to approve or reject the form. If rejected there will be notes that you can review in order to make the correct adjustments and then resubmit the form. If the form is approved, this will complete the form and close it out.