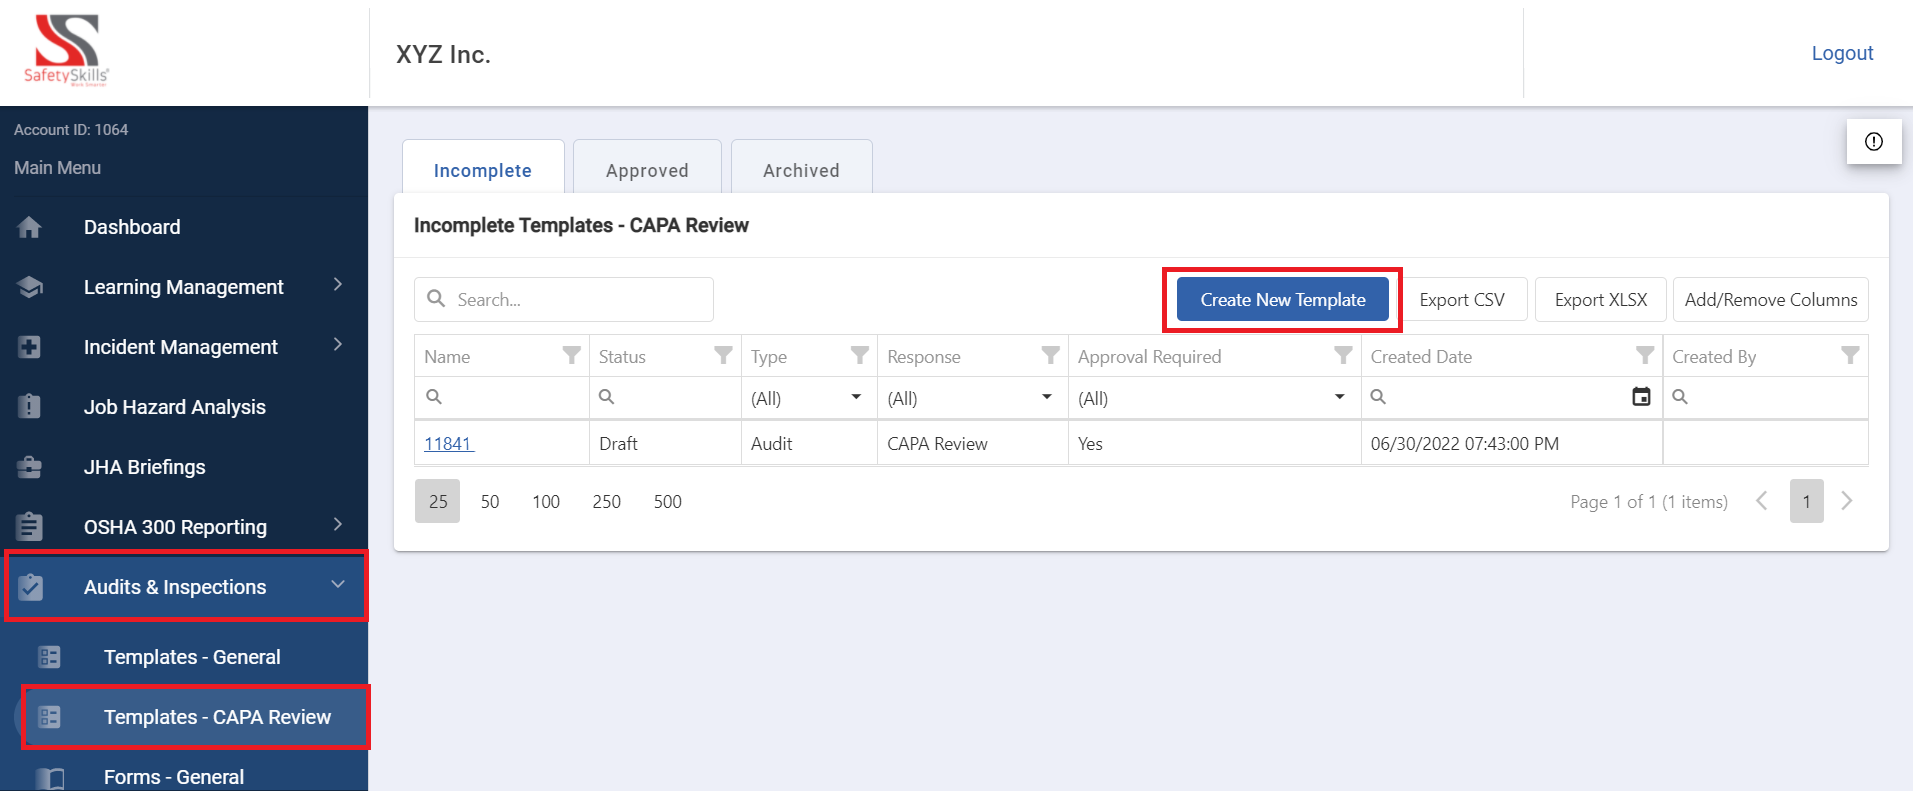
To create a new template, in the main menu select “Audits & Inspections” and click on the option “Templates – CAPA Review”. Then in the upper right hand corner, click on the blue “Create New Template” button.
This will generate a pop-up for you to fill in the initial information.
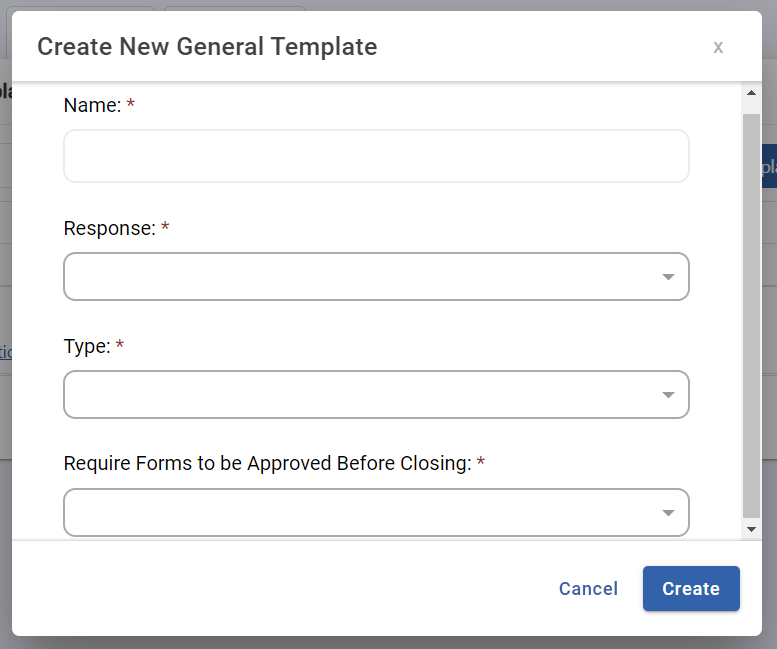
First, you will need to enter a unique name for your template. If you try to utilize a name of a template that has already been created an error will populate informing you to update the name you have selected.
After selecting filling in the name of your CAPA Review Form, next you will identify the type of template this will be. The options for this field are “Inspection” or “Audit”.

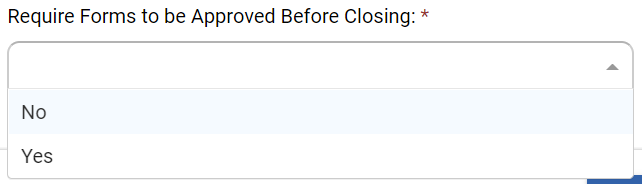
The final selection that will need to be made is if you would like to require any forms submitted created from this template to be approved before they are able to be closed. The options for this are “Yes” or “No”.
After all of the initial information is filled in, you can click “Create”.
This will populate the audit/inspection template that you created in your grid view on the “Incomplete” tab. Click the name of the template to continue populating its data. On this page you will need to enter the instructions and criteria for the template before submitting it for approval.
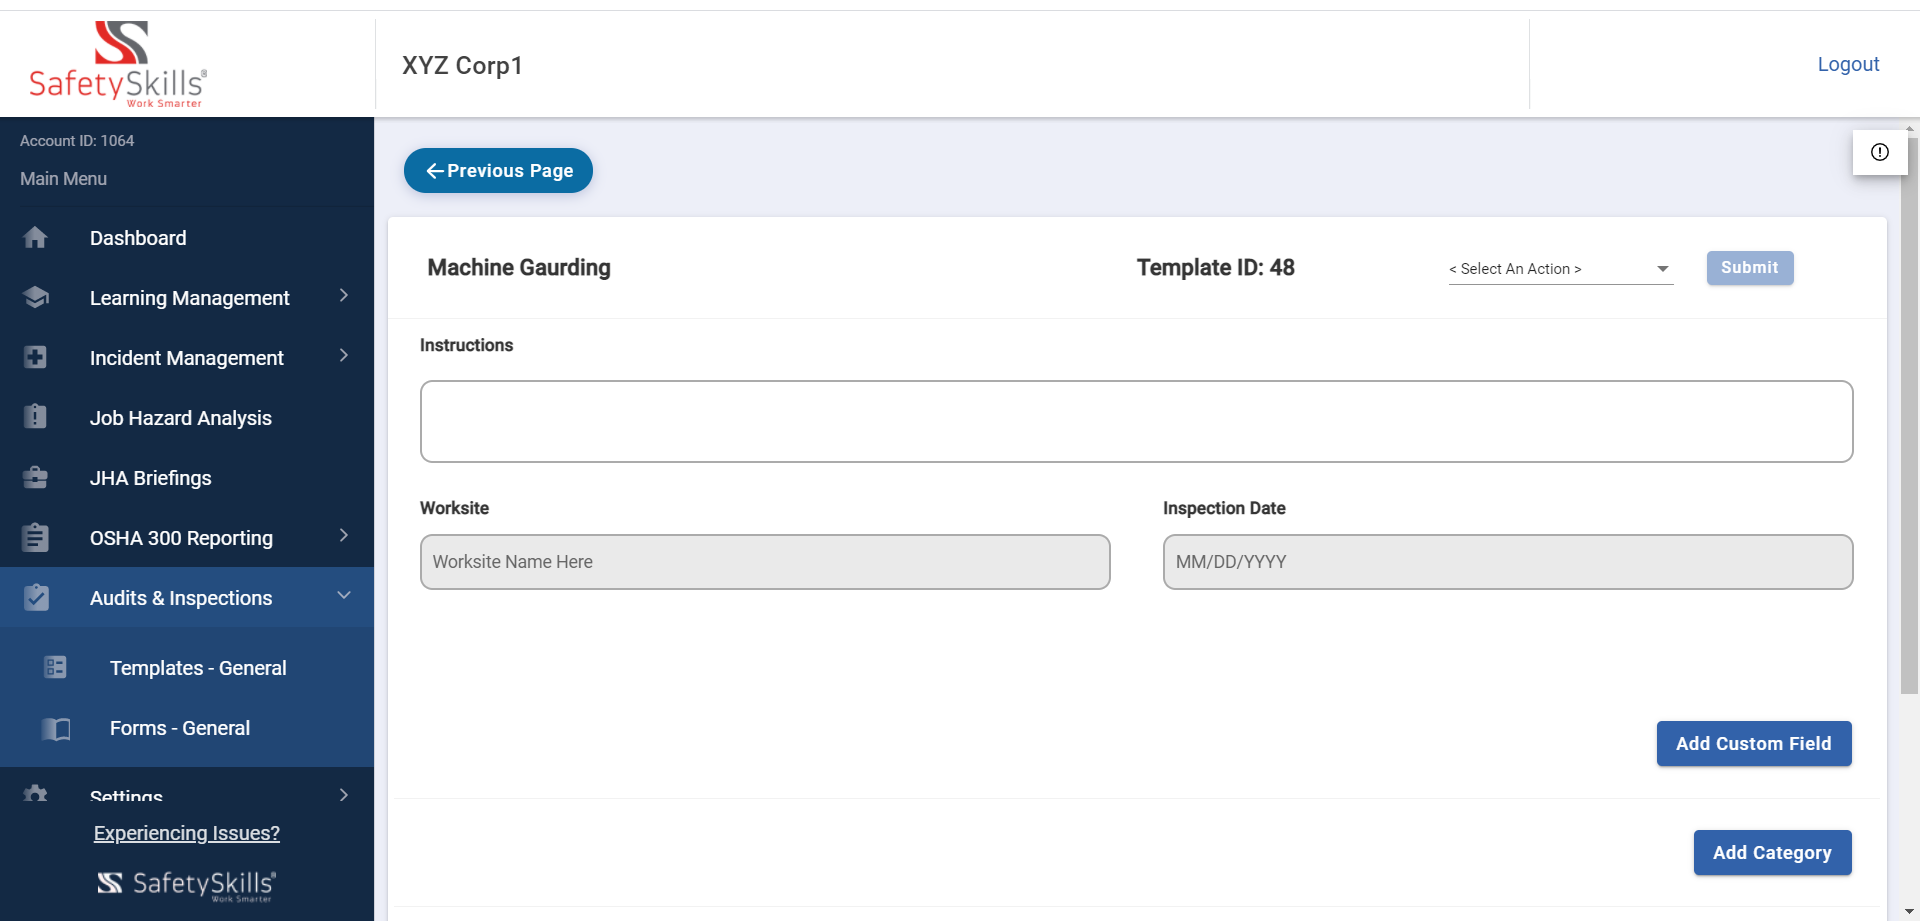
On this page if a section is highlighted in grey, you are not able to edit the information on this template, however the information will be present and can be edited on the form.
You will first need to fill out the Instructions section. The Instructions section will allow you to provide instructions for the specific audit/inspection template. This could include the logic you would like them to follow, or the definition of the criteria you have chosen for them to utilize. These instructions will then appear on every form created that is associated with this template and be un-editable on the forms. The maximum limit for this field is 2,000 characters.
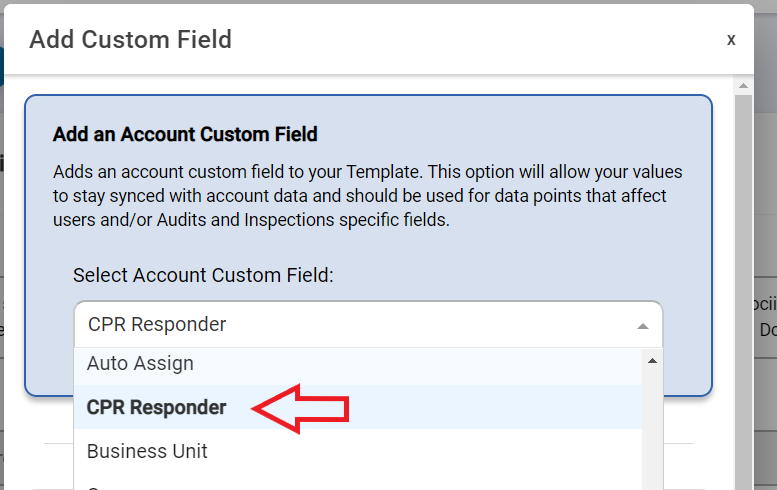
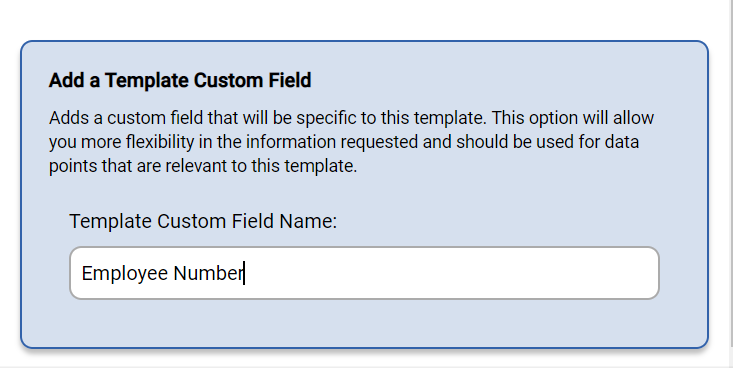
Account Custom Fields will be a list of the existing Custom Fields in your account. A Template Custom Field is a text box with a maximum limit of 50 characters. Depending on which item you choose, the option will highlight in blue and allow you to select/type the specific field you need. Once you make your selection, click “Add” at the bottom of the pop-up message.
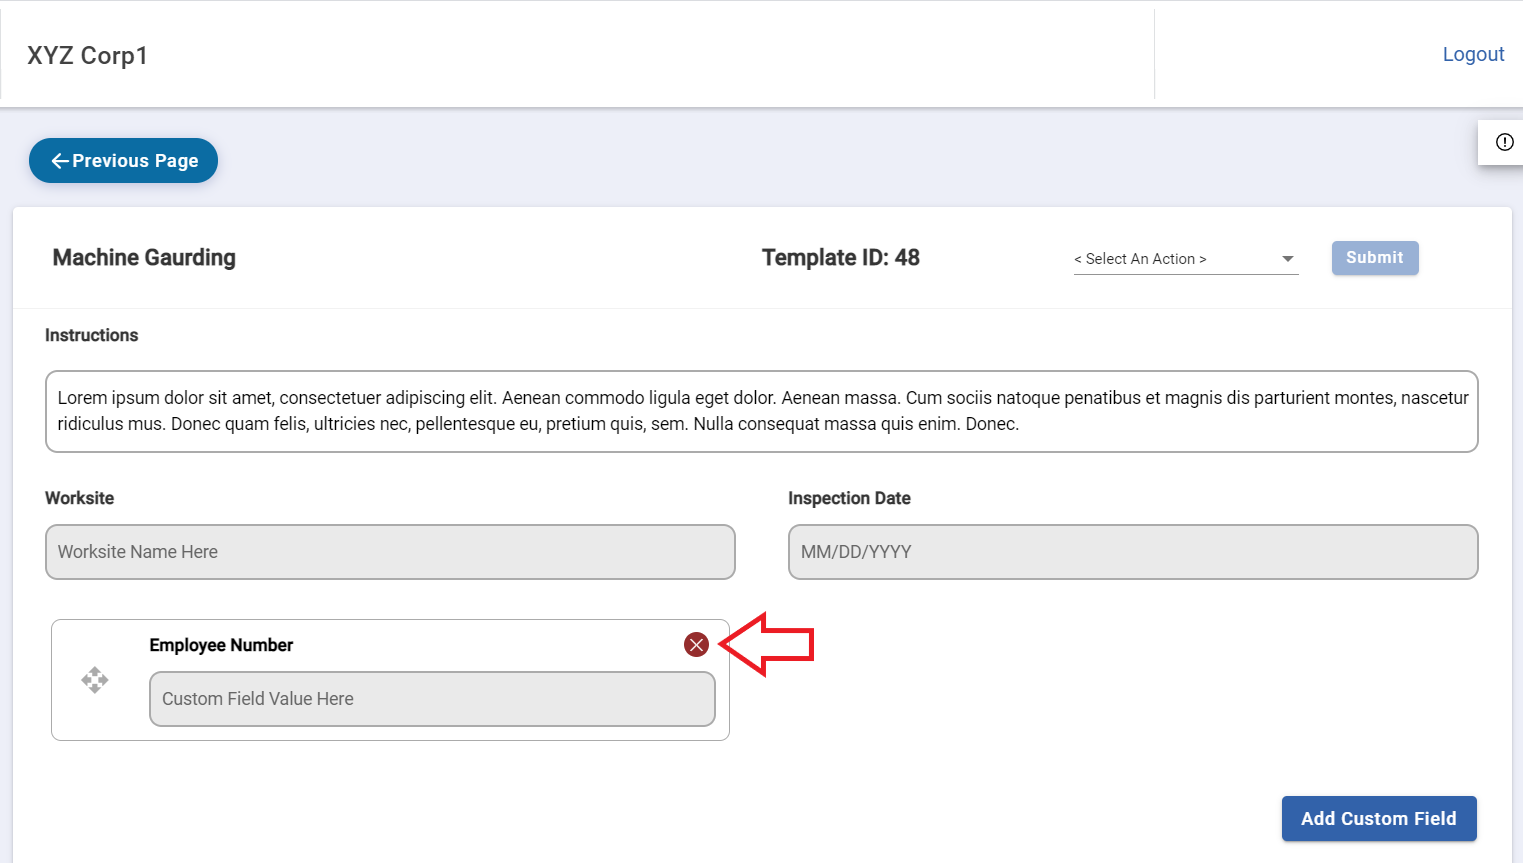
If a custom field is added in error or if it is no longer needed it can be removed from the template. To remove the custom field, you can select the red “x” button in the top corner of the field box you would like to omit.