It isn’t always feasible for your learners to take training on their own, which is where in-person training comes in. If you hold a safety meeting, present an offline class, or use one of our classes in Group Mode, the “Toolbox Sessions” feature enables you to track who attended the in-person training event. Marking learners as “Attended” for a session will mark a corresponding course assignment as complete, which allows you to run reports on it as you would any other course completion.
Toolbox Sessions can be created before or after the training or event takes place.
For information on how to create an offline course for training taken outside the system, please review this article: How to Create an Offline Course – SafetySkills Engage. For more information on presenting a SafetySkills course to a group, please go to this article: How to Train Your Users with Group Mode in Toolbox Sessions – SafetySkills Engage
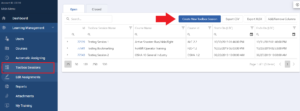
From the menu, click on the “Toolbox Sessions” option, then click the blue “Create New Toolbox Session” button.
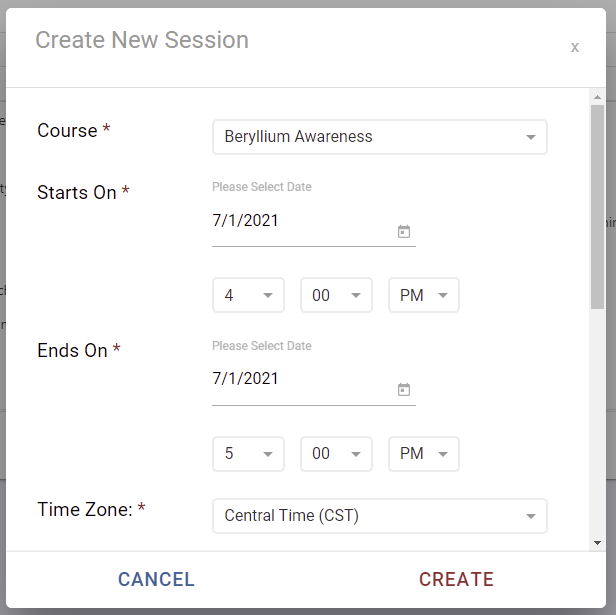
This will populate a pop-up box where you will select the course you are creating the session for, as well as any additional information you might choose to enter. You will need to scroll down to see all the options to create the session.
- Starts On: The date and time the training starts on. The time is configured with a sliding bar at the bottom of the calendar pop-up.
- Ends On: The date and time the training ends on. The time is configured with a sliding bar at the bottom of the calendar pop-up.
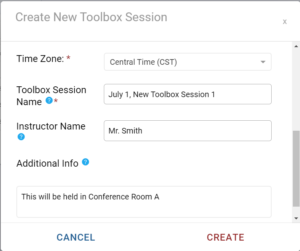
- Time Zone: The time zone the training will take place in.
- Toolbox Session Name: Each session must have a unique name. We suggest using a naming convention that provides you with information about the session from a glance view. Information that may be beneficial to have in the name is the course topic, date, location, etc.
- Instructor Name: Name of the person or company leading the training, if applicable.
Additional Info: This should include information like “Building C, Room 30” or where you can enter instructions for your learners like “pack a lunch” or “Be sure to wear closed-toed shoes.”
Once you have all the information entered, click “Create.” You will see the new session in the information table on the “Toolbox Sessions” page. To access a session’s details, export a calendar reminder, and to mark learners as having attended that session, click on the session ID in the left column.
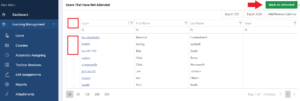
The section called “Users That Have Not Attended” will display all of the users that have not yet been marked as attended in the session you are viewing. Everyone who has been marked as attended for the session will show in the “Attendances” section of the page. For the administrative user types who require permission to see specific groups, these administrators will only see the people in the groups they are assigned to manage.
Please note that the “Attendances” list will be active and archived persons that were marked as attended in the session.
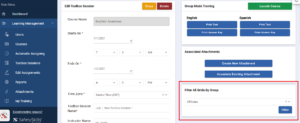
To show that someone has participated in the session you will need to use the check box and actions in the “Users That Have Not Attended” grid at the bottom of the session. Select a user by clicking the box on the left. If you would like to select a whole group, you can do this by filtering for the group in the box on the right, and then clicking the “select all” box. Please note the group filter will apply to both of the user lists on this page.
Once you have selected the desired list of learners, click the green “Mark as Attended” option on the right side of the page.
The course associated with the session may or may not be assigned to your learner(s) at the time the session is created or when you use the “Mark as Attended” function. Please see below for how marking as “attended” will impact your learner’s assignments based on their current settings:
- User is assigned the course and it is currently active:
- If you select a learner to attend a session that has an active assignment of the course, regardless of how long ago the assignment activated, that assignment will be marked as completed.
- Marking the user as attended will also trigger the Automatic Assigning feature to create a new assignment, if needed.
- User is assigned the course, but it is scheduled for the future:
- If you select a learner to attend a session that has a future assignment of the course, a new assignment will be created and marked as complete for the session. The “Activation Date” and time will be the same as the “Attended Date” and time. The “Due Date” will be the same date, but the time will be 11:59 PM.
- Marking the user as attended will also trigger the Automatic Assigning feature to update the future assignment dates, if needed.
- User is not assigned the course:
- If you select a learner to attend a session that does not have an active assignment of the course, an assignment will be created. The “Activation Date” and time will be the same as the “Attended Date” and time. The “Due Date” will be the same date, but the time will be 11:59 PM.
- Marking the user as attended will also trigger the Automatic Assigning feature to create any future assignments, if needed.
After the users are selected and you click on the “Mark As Attended” button, this will bring up the confirmation pop-up allowing you to make the status change.
Please carefully review this pop-up message before make any changes.
You will be asked to enter the “Number of Attended,” update the “Attended On” date and time, and update the “Total Training Hours.” The time you enter here is what will show up for the total time on the reports page.
Filling out the pop-up with the required settings will enable the “Attend Toolbox Session” button. Clicking this button will complete the process to mark the course as complete for the learner(s). They will then show in reports as complete.
Please note, actions performed on this page will not edit assignments that are already “completed” or “passed.” If a user has already been marked as attended for a session, you cannot mark them attended again in that same session, or edit their initial completion date or total time.
A user can be marked as attended in multiple sessions for the same course. Please see the section above about how assignments are used or created by the Toolbox Sessions feature.
When you are done with a “Toolbox Session” it can be closed by clicking the “Close” button on the upper right of the session’s information page. This action will update the “User’s” grid to only show the people who were marked as “Attended” in that session.
If you wish to delete a “Toolbox Session” this can be done, but only if no one has been marked as “Attended” in that “Toolbox Session.”
From the learner’s perspective, they will see any assigned course on the “My Training” page. Please note: If there is an assignment of an online course that is intended for a session or group training, the learner has the ability to take the course before the session date if the assignment is active.
If they have an offline course assigned to them, they will be able to select the title of the course like they would with an online course. However, when they view the assignment page they will not have any options to change the assignment. There is a message advising them the course is offline and to contact an administrator for assistance.
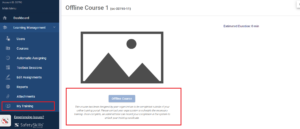
Please note: Any learner that attended the training must be marked “Attended” by an administrator in the system. Otherwise, their offline training will not be marked as complete and will not report in their completed training reports.
If you would like to add attachments to a “Toolbox Session” please review the help article How to Individually Associate Attachments – SafetySkills Engage
The option to “Export Calendar Reminder” will export an iCalendar (.ics) file to the computer of the person who clicks the button. This option is currently set to UTC, Coordinated Universal Time, depending on where you are the time it sets in your calendar might be different from the time selected on the session. After you import the data into your calendar you can adjust the times to your correct time zone, save the changes and then invitee your attendees.
If you have any questions about the “Toolbox Sessions” feature, please contact SafetySkills Help Desk by emailing support@safetyskills.com, or by calling 405-463-6656, option 2.