The LMS allows you to customize your view of the information table on the Users, Courses, Sessions, Edit Assignments and Reports tabs by using the “Add/Remove Columns” button. This feature works the same way on all of the pages. However, at this time, only the Reports page has the ability to save your settings.
The columns available will vary depending on which page of the LMS you are on. However the Users, Edit Assignments and Reports pages will allow you to access any of the additional “Custom Fields” you have added to your account.
To utilize this feature, click on the “Add/Remove Columns” button. This button is typically located above the information table on each page. This will open a pop-up box called “Column Chooser.”
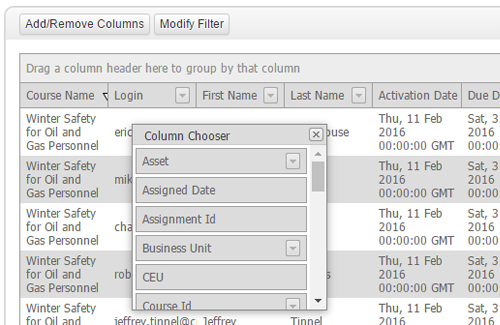
If you would like to add a column to the view, begin by locating the field/column you would like to add to your view in the list in the “Column Chooser” pop-up.

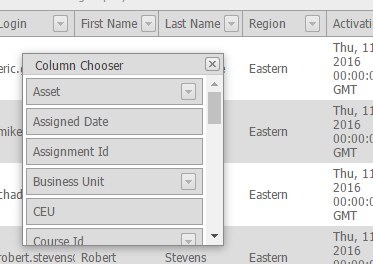
Click and hold the column you want to add and drag it to the header row where you would like to place the column. When 2 white arrows appear, you can release the column:

The new column should now appear in your table:
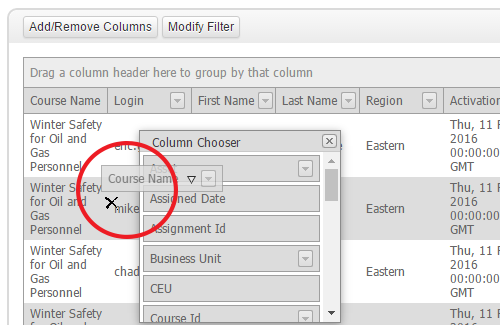
If you would like to remove a column, it is a similar process.
You will locate the column you wish to remove from the table, click and hold on the column header, and drag it to the “Column Chooser” box. Drop the header when you see the black “X” appear in the “Column Chooser” box.
Please note: only the Reports feature has the ability to save the information table’s settings. The other pages will reset to the default view each time you leave the page. For more information on how to save reports, please review our help article here.