Editing a General Form
This page allows you to edit details within the forms that you have created before you submit them for approval.
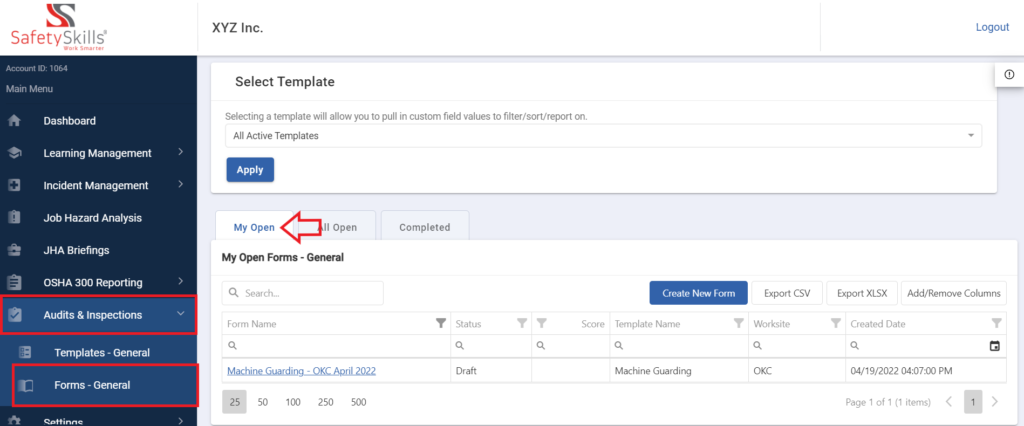
To edit a form, in the main menu select “Audits & Inspections” and click on the option “Forms – General”.
Please note, you are only able to edit forms that you have created. To begin editing, the first step is on the “My Open” tab select the form name highlighted in blue on the left side of the grid view that you would like to modify. This will open the details of the existing form.
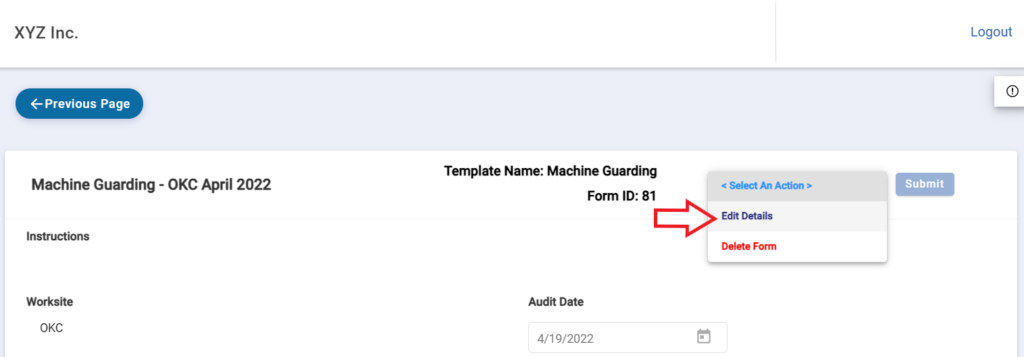
In the top-right corner, there is a drop down menu labeled “<Select An Action>”. From this menu, select “Edit Details” and click the blue “Submit” button.
A pop up will appear and you will notice that you are able to update the Form Name, the required Worksite associated, but are unable to edit the required Template associated. This is because the form you are editing is based on the selected approved template.
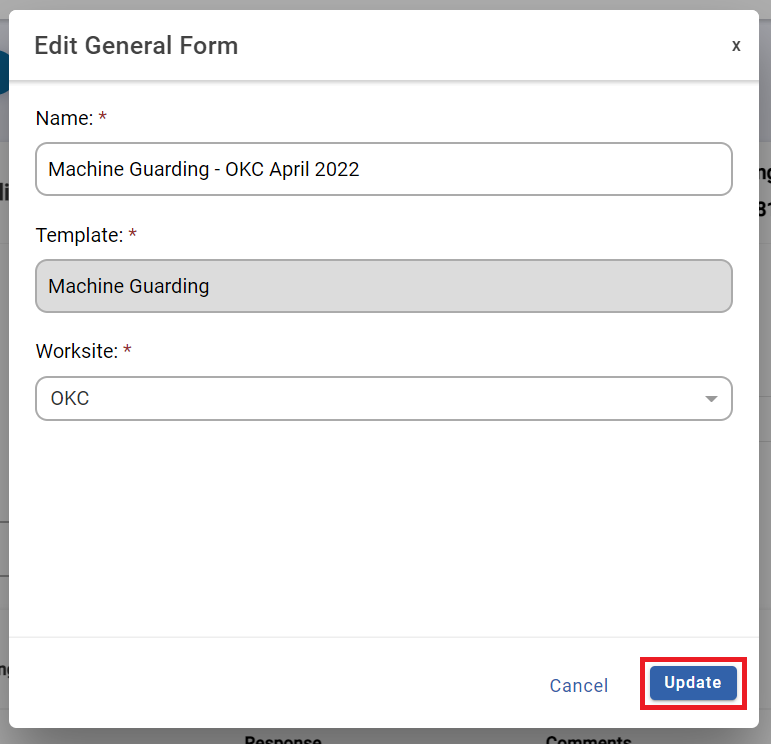
Once you click the blue “Update” button, this will direct you to the form to make additional changes. From here you can edit the details of the form and conduct your audit/inspection based on the instructions.
Based on the template you will be able to fill in any custom fields that were associated with the template, enter the inspection/audit date, and then move on to filling in the criteria items for the categories. Please note that an entire category can be excluded from being filled out by checking the box for “Mark All n/a” in the upper right hand corner. This will grey out the entire category.
For each criteria item you are going through in a category you will fill out the respective yes/no, pass fail, or 1-5 option. The options that you see for each item will be based on the type of template that you are utilizing.
You will be able to leave comments as needed for each criteria element and add attachments as needed, however for some items you may be required to enter this data in order to complete the form.
Also, if there was a citation created for the item you will be able to click the blue link to view that additional data.
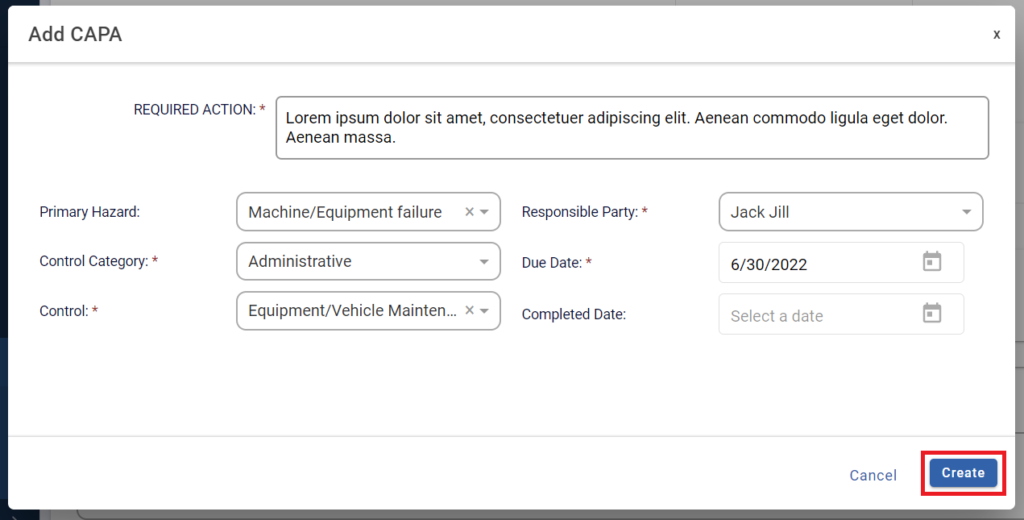
From there you can use the “Add CAPAs” option for items that do not pass the audit/inspection. To add a CAPA for an item click the blue “Add CAPA” button on the right side of the page across from the item. A pop up will appear and you will need to enter the following:
- Required Action – Please list what you would like the responsible party to complete.
- Primary Hazard – Select the primary hazard that is the reason this corrective action is being created.
- Control Category – Select the correct control category.
- Control(s) – After selecting the correct control category you will choose the corresponding control that you would like to be completed.
- Responsible Party – Will only show a list of users’ logins that are active users in the system. Select the person that you would like to complete this CAPA.
- Due Date – Select the date that you would like this CAPA to be completed by.
- Completed Date – This is optional. If the CAPA has already been completed by the responsible party when this is being filled out you can enter the completion date. If this has not yet been completed this will remain blank.
After all of this has been entered click the blue “Create” button.
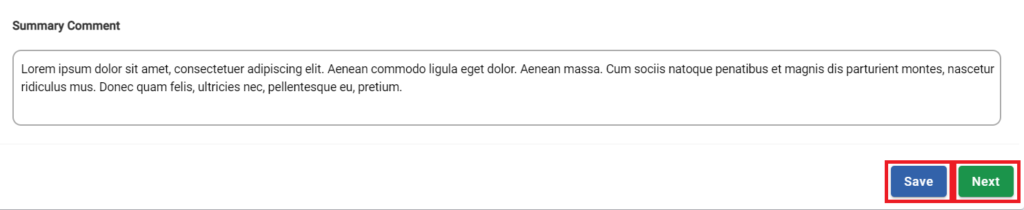
At the end there will be a Summary Comment that you can fill in as desired or indicated by the instructions of the template. This section is an open text box for you to write any additional information regarding the form that is not necessarily applicable to an individual audit or inspection item. You can edit the comment at any time as long as the form is open.
Once the form has been filled in you can click “Save” or “Next” if it is enabled. Please note that “Next” will only be enabled once all items associated with the form have been completed. This means if an item requires an attachment that one is associated with it, if it requires a comment that this information is filled in, and if any CAPAs were assigned that they have been completed.
When all of the necessary items have been finished then the “Next” button will go from gray to green, and at this point you are able to select this to continue on in the form.
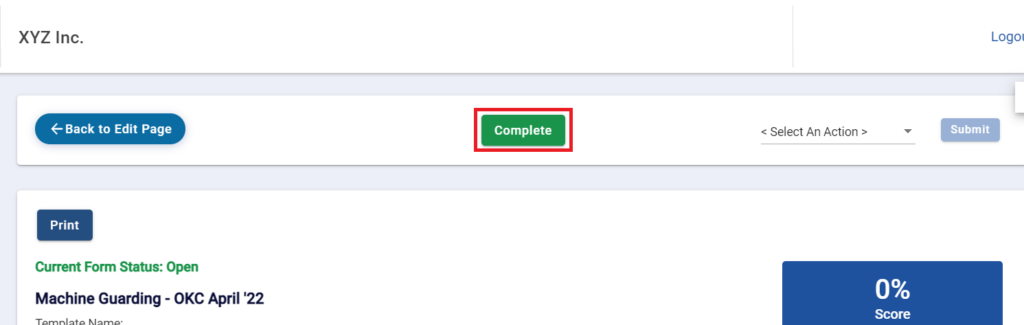
On the next page you will either be able to complete the form or submit it for approval. The options that appear here are determined by the settings of the template that you are utilizing.
If you see the option “Complete” you can click this button and this will complete the form. This will close out the form and you will have a review page with the details from your audit/inspection.
If you see the option “Submit for Approval” this means that the form needs to be reviewed before it is able to be closed.
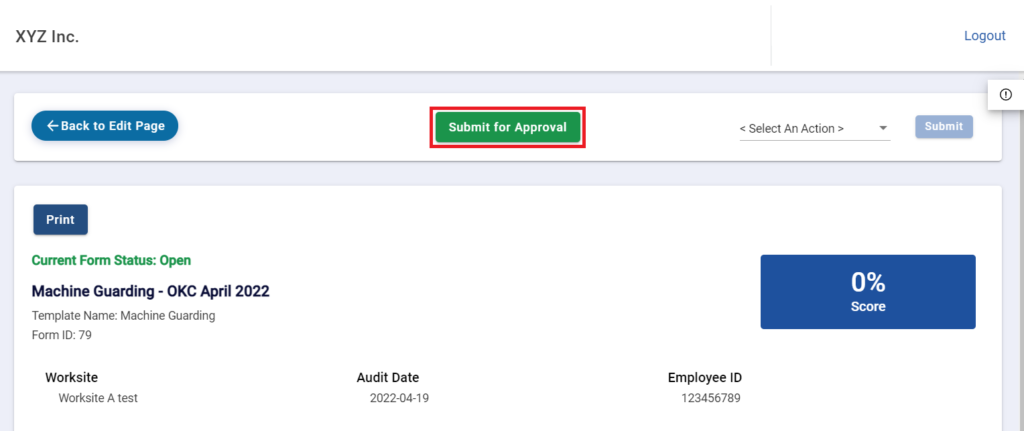
Once you click this button it will notify the correct contacts for your account that they need to review the form. From here that user will be able to approve or reject the form. If rejected there will be notes that you can review in order to make the correct adjustments and then resubmit the form. If the form is approved, this will complete the form and close it out.
Deleting a General Form
To delete a form, in the main menu select “Audits & Inspections” and click on the option “Forms – General”.
Navigate to the tab that lists the Form that you would like to delete. Once you have identified the form, click on name highlighted in blue on the left side of the grid view. This will open up the form details.
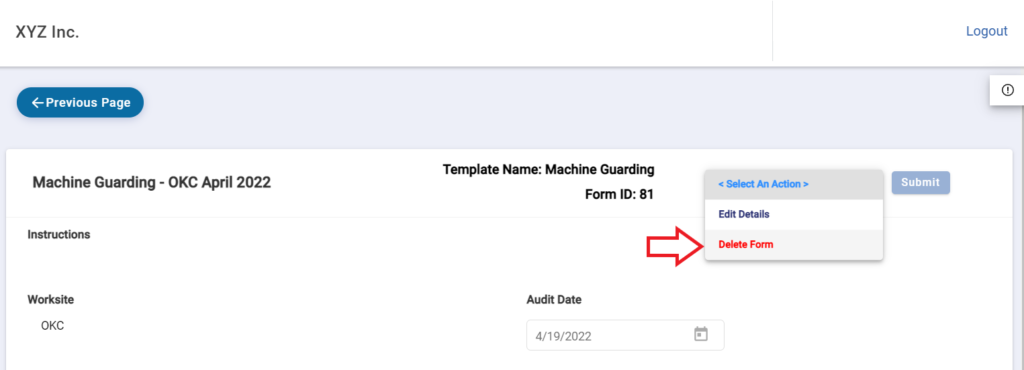
In the top-right corner, there is a drop down menu labeled “<Select An Action>”. From this menu, select “Delete Form” and click the blue “Submit” button.
You will then receive a pop up for you to confirm that you understand that deleting this form cannot be undone.

If you would you like to proceed with this action you can click the blue “Delete” button. This will delete the form from your account.