This article is designed to give you a brief overview of how to get started in your Direct account.
You’ve signed up for a Direct account–but now what? The videos and knowledge base articles are great but may require some patience to search for exactly what you need, especially when most articles are designed for our larger account types. This article compiles the basic information you need to get started with your Direct account, and each section links directly to any applicable help articles or videos on the subject.
Signing In
When you signed up for a Direct account, you should have received an email from system@safetyskills.com. This email will contain the website URL for your training website, as well as your login information. If you do not see it in your inbox, be sure to check your Junk or Spam folders. The email should look similar to this one:
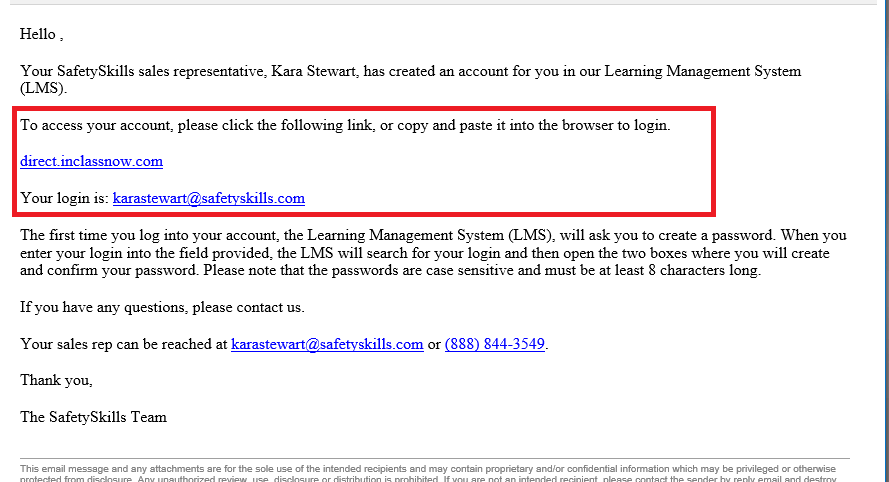
By clicking the link, your training website will launch in your internet browser. You can save this as a favorite in your browser for easier access by clicking the icon that looks like a star in your browser. This is typically located in the upper right corner, below the boxes that allow you to exit and minimize your browser window.
Once you are on your training website, enter your login ID into the login box. This will prompt the system to open two text fields to create and verify a password. It must be at least 8 characters long, and is case-sensitive. Then, you may click the blue “Sign In” button at the bottom.
Uploading Users
To upload more users to your account to assign them training, please begin by clicking on the “Configure” tab. It is located in the upper right, and looks like two gears. Depending on how many users you would like to upload, you may select either “Add User” or “Add Multiple Users” from the drop-down.
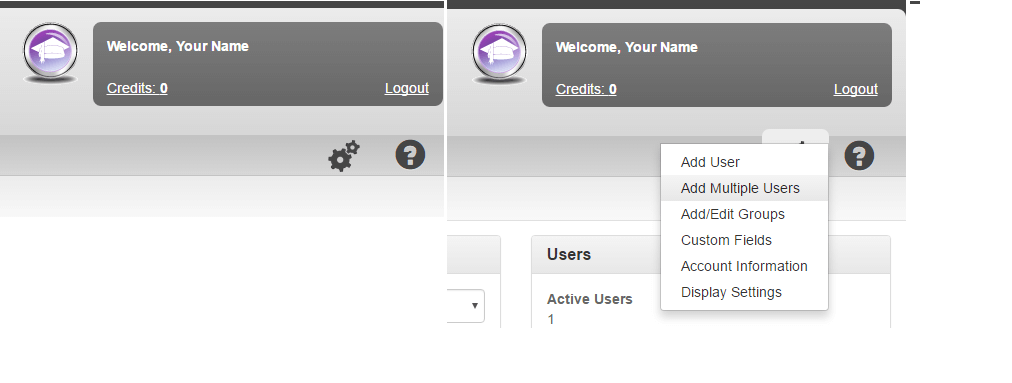
You will then fill out the information for each user, either in the “Add User” tab or the template for “Add Multiple Users.” You will not create a password for your users; they will be prompted to do so when they login for the first time. Both ways of adding users will also give you the option to send your learners a welcome email, similar to the one you received when you signed up for your Direct account.
Purchasing Credits
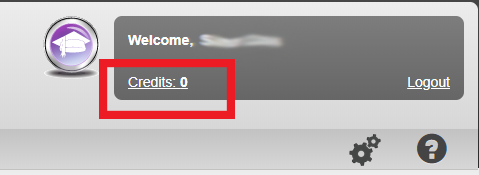
The Direct account type requires the purchase of credits to create assignments, and the amount of credits each assignment needs will vary based on the course or courses and the number of people you are assigning it to. Once you have browsed the course list and know which courses you would like to assign, you can purchase credits by clicking the “Credits” link at the top right under your welcome banner. This link will open a new page.
On this page, you can view a price per credit to be purchased. To estimate your cost you will need to know how many credits you need to purchase to successfully make the assignments.
On the left, you will enter your card information. In the center, you will enter the billing information for the card you are using to purchase the credits. On the right, you will enter the amount of credits you need to purchase, add any applicable promotional code you may have, check the box to agree to the purchase disclosure, and clicking “Purchase”. The system will then calculate the total and provide the final “Authorize Payment” button, clicking this button will finalize the transaction and process a one time charge on the card you have provided. The system will not save any card information. Each time you need to purchase credits you will follow this process again.
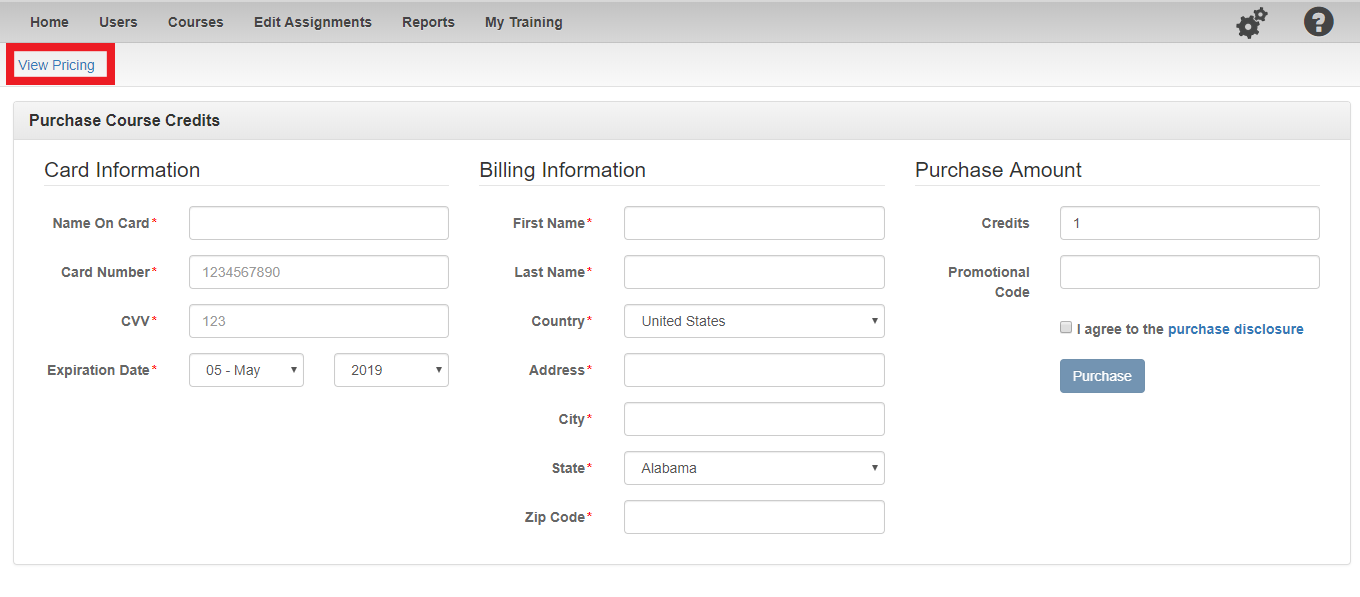
When successfully purchased, a message will appear in the upper-right and the “Credits” link will now have a number next to it, representing the amount of credits you have. A receipt for your credits purchase will be emailed to the email address that is listed to your LMS Owner profile.
Assigning Training
Now that you have purchased credits, you may begin assigning training. To do this, click on the “Users” tab and select the check-box on the far-right from any user you wish to assign training to. Then, click the green “Next” button at the top right.
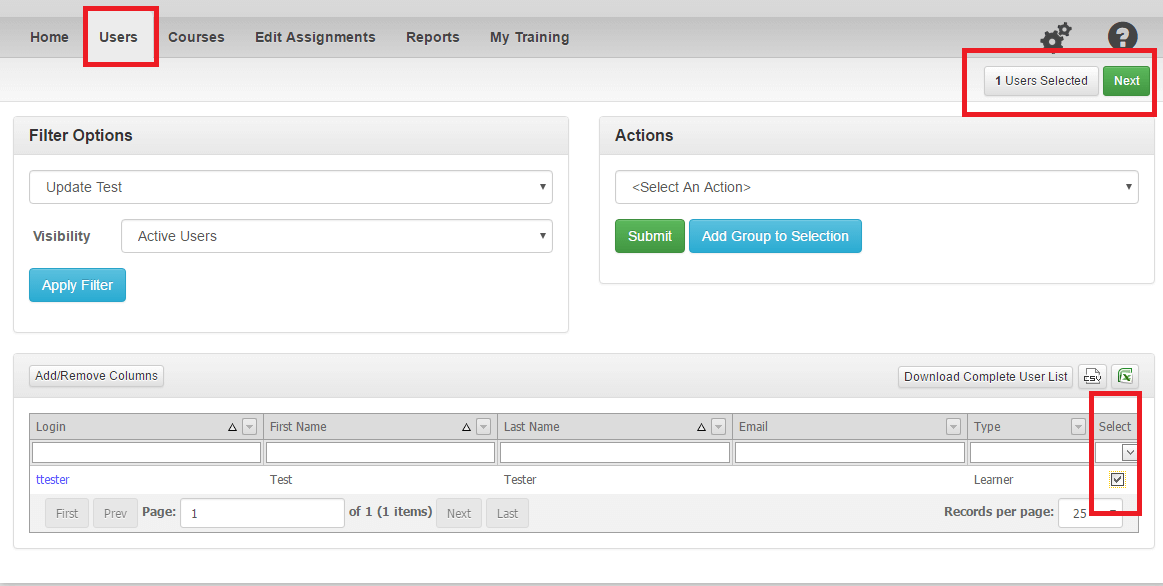
This will take you to the “Courses” page, where you can select the courses you wish to assign. Then, click the green next button at the top.

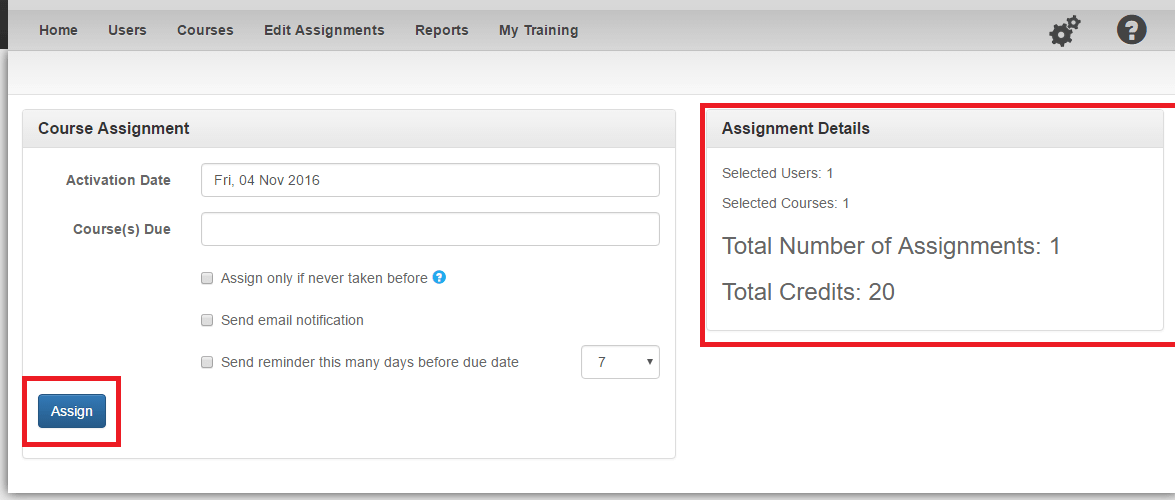
This will take you to the final assignment screen, where you can choose to set a due date, have an email reminder sent, and review a summary of the amount of credits you are spending.
When you are finished, click the blue “Assign” button. This will deduct the listed amount of credits, and assign those courses to the selected users.
Taking Training
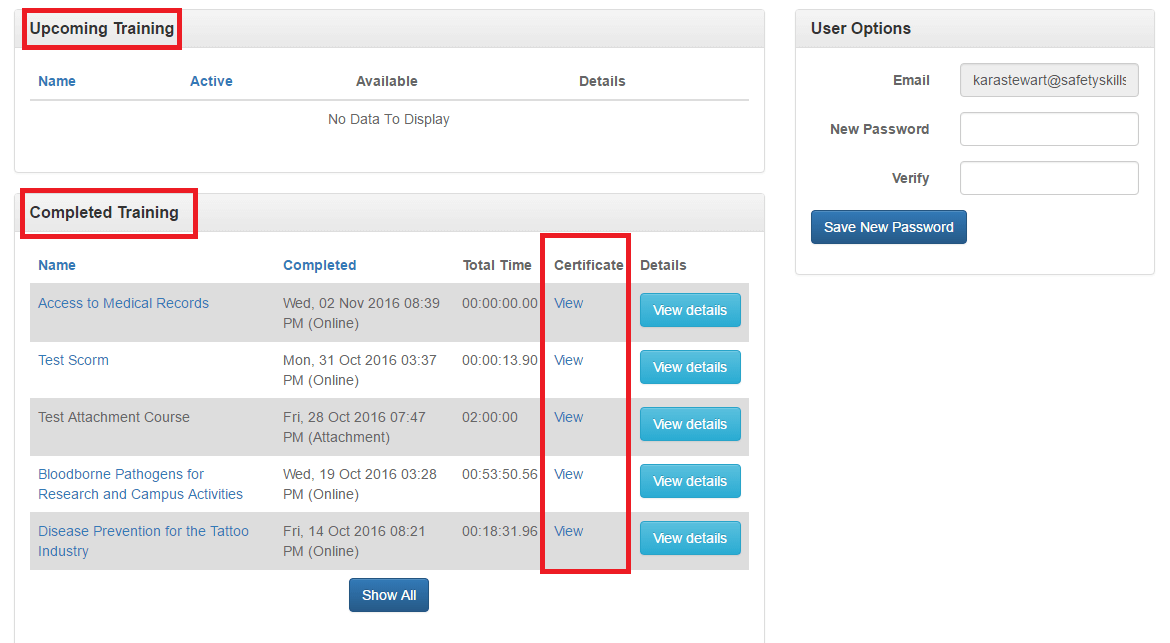
To take training, please click on the “My Courses” tab. This page will allow you to take training, reset your password, view any upcoming training, and print certificates for completed training.
To launch a course, please click on the blue name of the course under the “Current Training” section. If you click the “Save and Close” option in your training, it will bookmark your training; this allows you to pick up where you left off the next time you access your training.
To view or print certificates for completed courses, scroll down to the “Completed Training” section at the bottom of your “My Training” page. After finding which course you would like to view or print a certificate for, please click the blue “View” link in the “Certificate” column.
Can’t find the answer to your question? Please click the red “Support and Feedback” tab in the bottom left corner of your training screen to browse our help articles, or to submit a ticket to our Support team.