New JHA
Before you can create a JHA, you must have all your establishments, worksites, job activities, hazard and controls added into the SafetySkills Empower system. From the JHA home page (Main Menu, then select Job Hazard Analysis) , click the Create New JHA. Because procedures and equipment may differ by location, you will be generating a JHA that is specific to an individual worksite.
- Select the Worksite for where this JHA is being held
- Select the primary Job Activity for this JHA then click continue
- Select the newly created JHA from the list in the Incomplete Tab
- Select ‘Edit Description’ from the dropdown menu then click Submit
- Enter job activity description and any other pertinent info in the text box. Add images by clicking the picture icon and uploading from your device and click Save
Now the JHA template has been created for your specific worksite, you’ll need to populate it with the job steps to be performed, and add the appropriate hazards and controls to each job step.
Create Job Steps
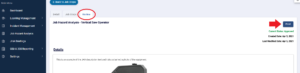
From the menu list, you’ll see your new JHA – click on it and it will take you to the detail tab. Confirm the worksite, primary job activity and date created are all correct.
- Select Proceed to Job Steps
- In the Job Steps tab, click +Add Job Steps
- Enter first job step name (include short description, if preferred) then click Done
- Click on hazards, then +Add Hazard
- Select a hazard from the dropdown menu (hazards displayed are those in the Active Hazards list in Settings)
- Add a description of the hazard specific to the job step/activity
- Select a control from the dropdown menu (controls displayed are those in the Active Controls list in Settings). You may add multiple controls for the hazard
- Continue adding job steps, adding hazards and controls, until the job activity is fully documented
- Click Proceed to Review
- Review for accuracy, then click Submit For Approval – a notification will be sent to the appropriate user, and once approved, the JHA will appear in the Approved tab
Approving a JHA
- Normally, if you submit the JHA for approval, another assigned user will receive the notification, review the JHA, and approve it
- If you are the designated approver you will receive an email with a link to the JHA to be approved. You will be directed to the Details Tab. Review the information on each tab and then select Reject JHA or Approve JHA on the Review Tab
- If you are the Account Owner and are self-approving JHAs (perhaps for testing or training purposes), you will need to click browser refresh, then navigate back to the Review Tab to Approve your JHA
Printing a JHA
Once a JHA has been approved, you have the option to print a final copy.
- To do this, go to the Approved tab and select the JHA you would like to print
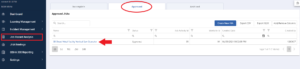
- Once you have selected the JHA, next go to the Review tab to locate the Print button
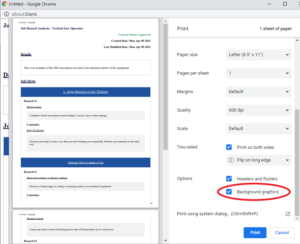
- When you select Print, on the printing pop-up, be sure to enable “Background graphics” to ensure your document is formatted properly. This check box option could be located in the “More Settings” drop down menu
- Lastly, you can select Print. If you have any questions or need further assistance, please contact support@safetyskills.com