You have the ability to create custom fields to organize user information within your LMS. Some examples of these fields could be department, job title, or location. The ability to access and configure the account’s custom fields will depend on the user type you are assigned. For more information about user types and permissions please review these two articles: Creating User Types and User Permissions
To begin, go to the menu and click on “Settings” then, “Custom Fields.” This will load the page to configure and edit the account’s custom fields.
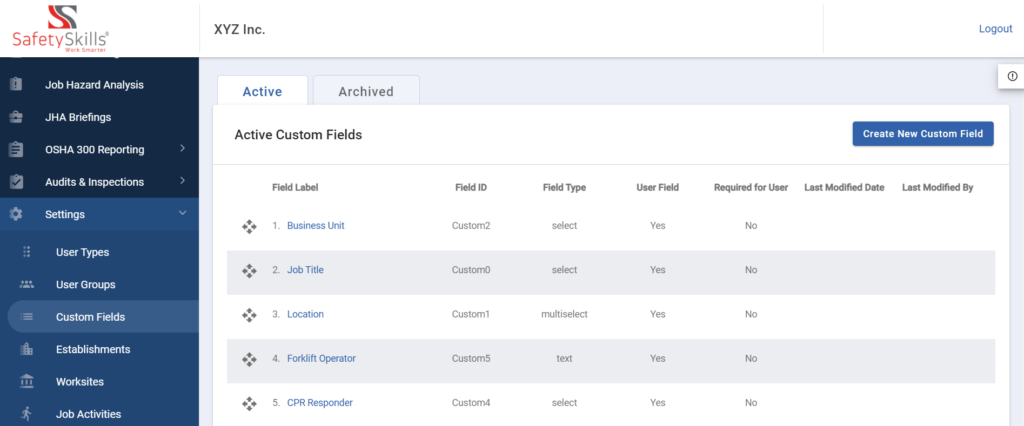
On the right, click the blue “Create New Custom Field” button. A pop up will appear where you can fill out the necessary information.
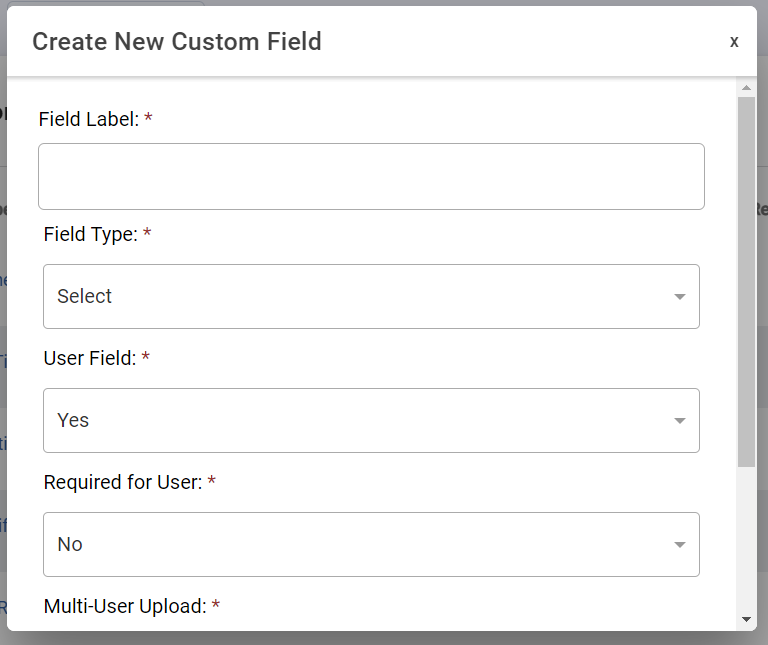
The first box “Field Label” is where you will enter what you would like the custom field to be called. For example, you would enter “Department” if you were creating a field to enter each user’s department.
Next, you will select the type of field you want. There are 3 options at this time:
- Text:
- This field type will allow you to type in anything you want in the field.
- Select list:
- This field type will allow you to establish a list of items for that field.
- Then when adding or editing a user, you will select one option from a drop-down list, or list only one item on a user list import file.
- Multiselect list:
- This field type will allow you to establish a list of items for that field.
- This field type will allow for multiple field items to be listed to a single profile.
- Values on the user export and import files will need to be pipe separated (|), however when adding your list items to the system they must be listed one per line.
- For example, if our Department field is multiselect I would list all the departments for one profile as Shipping|Receiving|Accounting if the profile was to list all these options.
Next if you have a SafetySkills Empower account you will be able to select “Yes” or “No” for “User Field.” If you have a SafetySkills Engage account this will default to “Yes”.
Having the option “Yes” in the “User Field” box means that this information can be associated with your users’ on their profile level and will be able to be pulled in on the different pages within the Learning Management System. Also, you will be able to use the values provided in these custom fields to create Custom User Groups. Having the option “No” in the “User Field” box means that this information will only be associated with Templates and Forms in the Audits & Inspection feature.
Depending on the selections you have made up to this point you may see additional boxes to fill in. If “User Field” is “Yes” you will see the option “Field Required”. Here you can select “Yes” or “No.” If you would like to require information to be entered into the field for each user, choose “Yes.” If you do not want to require this data to be entered for each user in your account, leave this as “No.”
If you have selected “Yes” for “User Field” and the “Field Type” is a Select or Multi-Select list the final option you will see is “Multi-User Upload”. The options for this are “Prevent new options from being added” or “Add new options on upload.” The “Prevent new options from being added” via multi-user upload will prevent new items from being added to your select or multiselect lists in mass. This will prevent edits to the fields list items when using the “Add Multiple Users” feature or HR Integration.
- This setting can help to improve group filter functionality by alerting you that there are new items on a file being uploaded.
- This option is also helping to prevent misspelling and other data mismatch issues.
- This option can be disabled by selecting “Add new options on upload.”
After you have made your initial selections click the blue “Save” button and this will create your custom field.
If you created a Select or Multi-Select list, you will now receive a pop up that asks if you would like to add your values to this field now or later. You can choose how you would like to proceed.
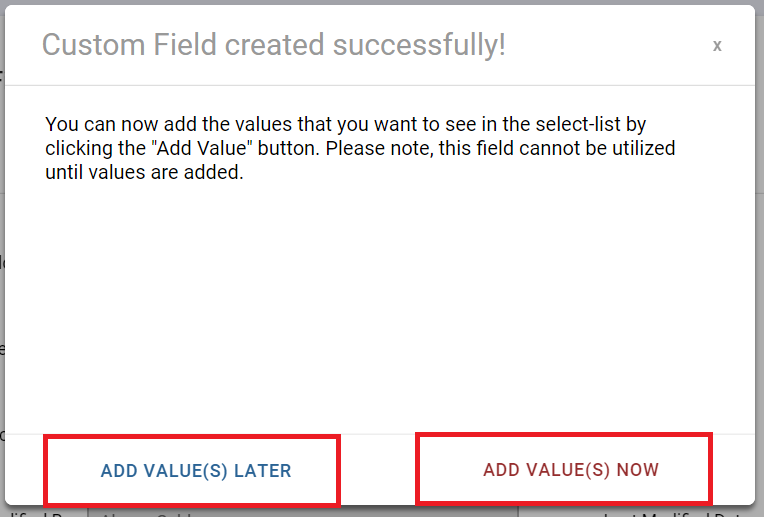
If you would like to add your value(s) now select that option and it will bring you to the next screen.
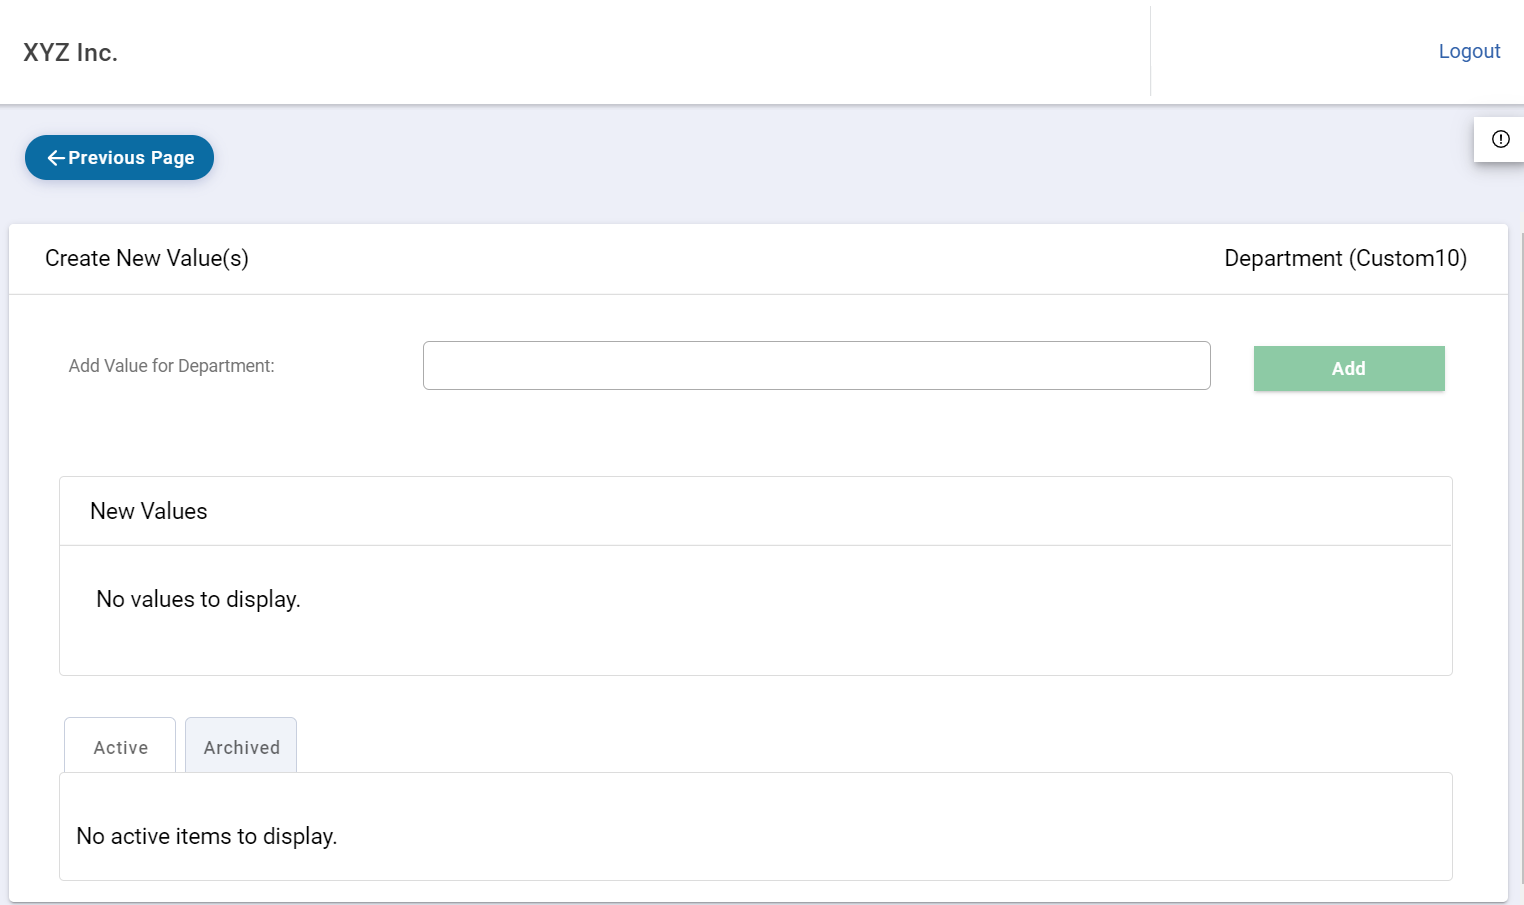
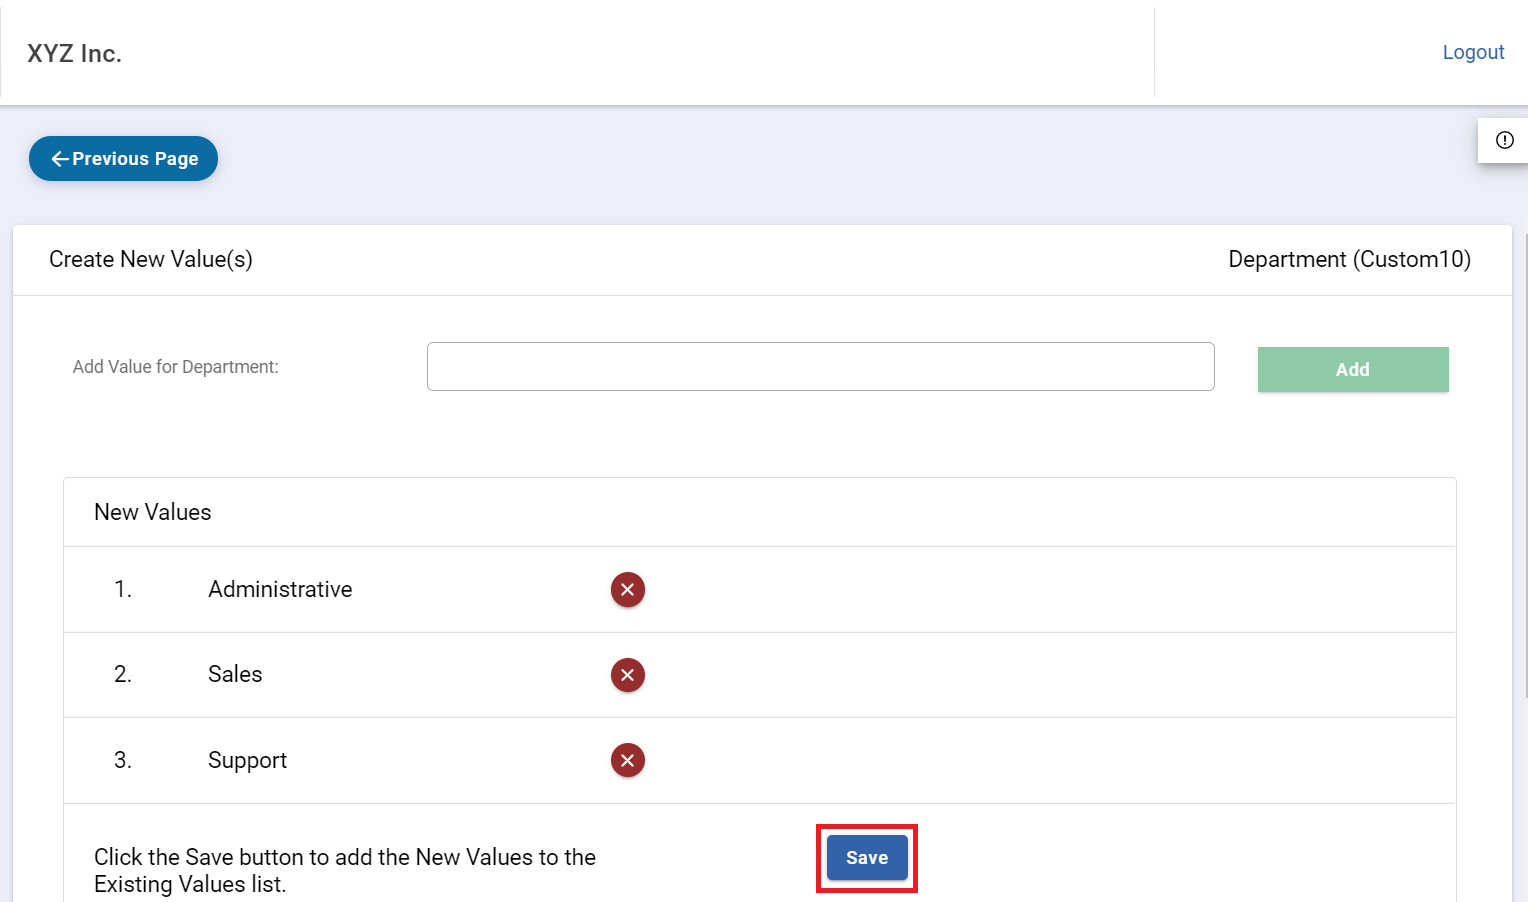
To create your values, type one value at a time in the “Add Value for Department” field and then click the green “Add” button”. Repeat this step for each value you would like to add for this field.
Once done click the blue “Save” button that appears to retain these values.
After clicking “Save” you should receive a pop-up that states “Value(s) added successfully”. This will then populate your values in the bottom of your list in the “Active” Tab.
Please note, if you are adding new values to your existing field data you may also need to update group filters to ensure the new data can trigger proper grouping of your people. For more information on how to update your group filters please go here: How to View and Edit Custom Groups
If you would like to remove a value from a custom field that is a select list or a multi-select list you can do so only if the options is not used in a profile and is not used in a custom group filter. To remove a list value, make sure you are on the custom field details page. Then find the item in the values listed and check the box to the left of the value you would like to delete. You can select multiple values if you would like to delete several at one time. Next in the “Select An Action” drop down select “Delete”. Click the blue “Submit” button and this will bring up a pop up asking you to confirm the action. If confirmed this will delete the value.

If you would like to archive a value rather than delete it, this can be done be selecting the box to the left of the custom field value. Then in “Select An Action” click “Archive” followed by the blue “Submit” button. If this item is not associated with any active users or used in a custom group filter you will be able to confirm in the pop up that you would like to archive this value and complete the action. However, if active users or custom groups are associated with this data, the pop up will inform you that where this custom field value is currently being utilized must be updated to a different value before you can archive this custom field value.

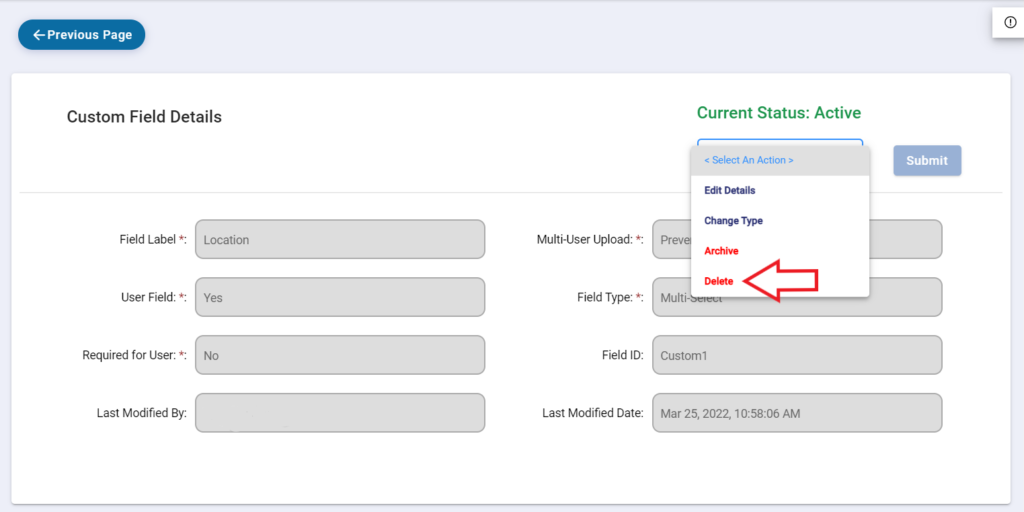
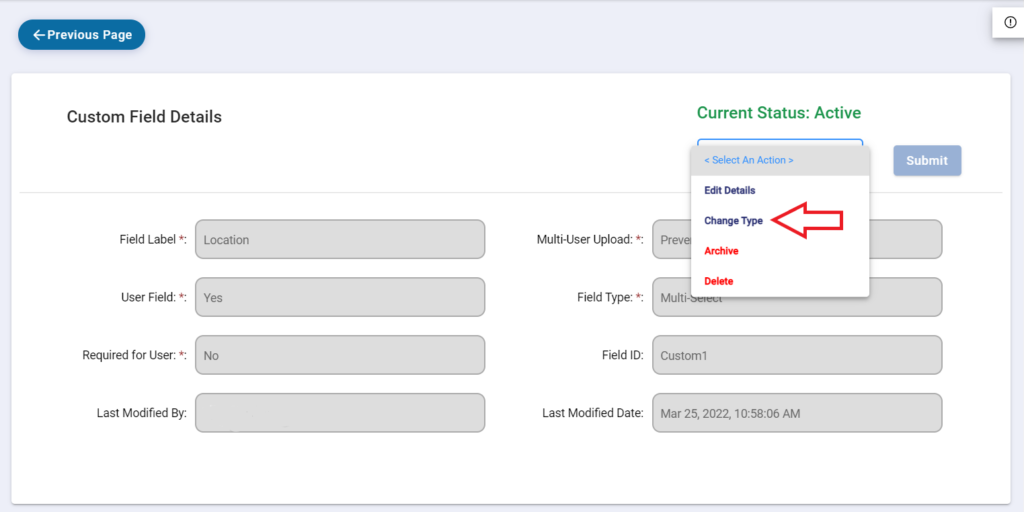
If you would like to delete an entire custom field, you can click on the blue name of the custom field you would like to delete. In the upper right-hand corner in “Select An Action” you can choose “Delete”. Then click the blue “Submit” button. You will then receive a pop for you to confirm this option with the understanding that deleting this field will remove all data related to this field on every user. If confirmed this will remove the custom field from your account. Please note, that if the field is being used in any group filters you will not be able to delete the field. However, it can be deleted even if there is still data listed in the users’ profiles.
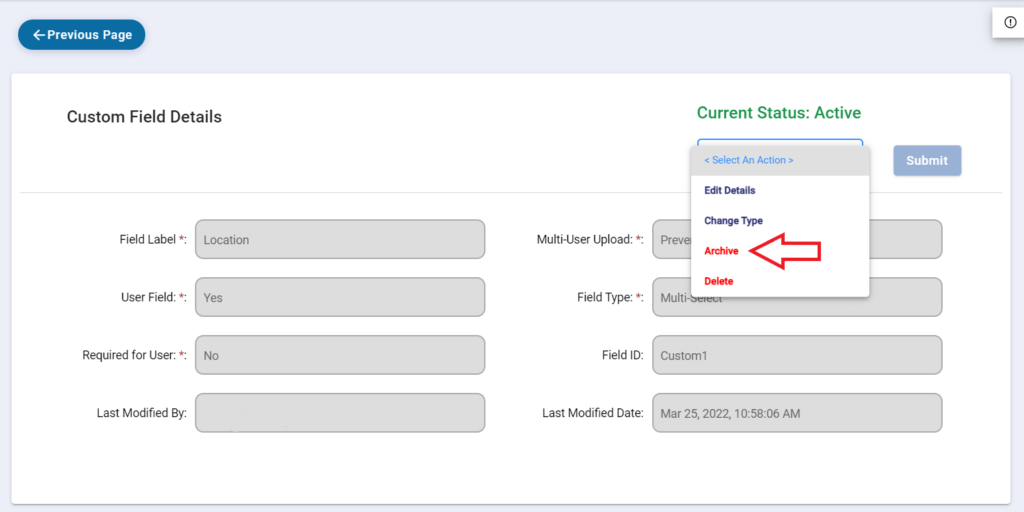
If you would like to archive a custom field, you can click on the blue name of the custom field you would like to archive. In the upper right-hand corner in “Select An Action” you can choose “Archive”. Then click the blue “Submit” button. A pop up will appear where you can confirm this action with the understanding that archiving this custom field will remove it from all areas that users are referenced. If this step is proceeded with, this will move this custom field from the active to the archived tab.
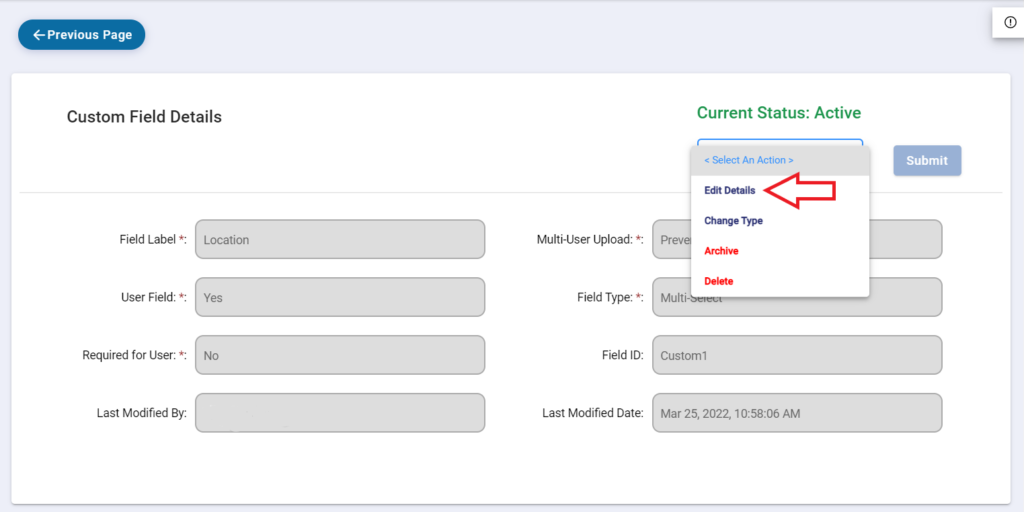
If you would like to change the name of the custom field, if it is a user field, required for users, or change the option for the Multi-User Upload to do so you will need to choose “Edit” details in the “Select an Action” drop down. When you click the blue “Submit” button these values that were greyed out will become editable. Any changes that you make you can click the green “Save” button.
If you would like to change the type of custom field, whether it be to a text, select, or multi-select list. In order to complete this in the “Select an Action” drop down choose “Change Type”. Depending on what you change it to the selection may be automatically applied as soon as the option is changed, or you may see a pop up requiring a confirmation in order to complete the action.
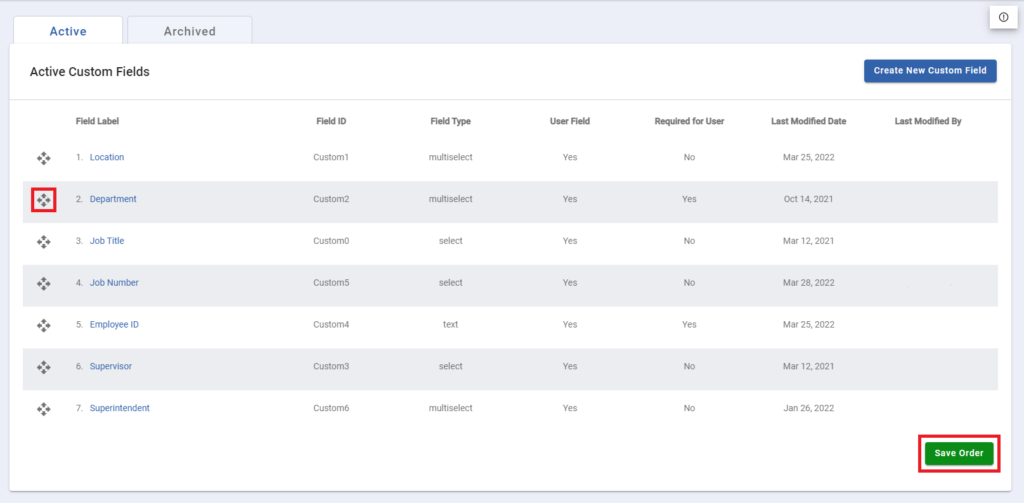
You can set the order of the fields by dragging them up and down. Click and hold the drag icon (looks like 4 arrows) then move the field where you would like it to be in the order. When you like the order click “Save Order.” The order set on this page will be reflected when viewing a user’s profile, adding a single user, and if the account has the feature turned on, the order of the Self Sign-up form.
Each SafetySkills account is allowed 18 account custom fields. If you run out of custom fields, you can edit or delete existing custom fields. Remember: if you change the name of a field you are only changing the title of the field, all data that has been entered for your learners in this field will stay the same.
If you have any questions about this process please contact the SafetySkills Help Desk at support@safetyskills.com or call 405-463-6656, option 2. The SafetySkills Help Desk is available Monday through Friday, from 7 AM to 6 PM Central time.
