Whether you assigned the wrong course, or simply need to alter the dates of one, it doesn’t have to be difficult. Instead of deleting and re-assigning each course manually, our Edit Assignments feature allows you to do this action for all your users at once. While the Owner and Super Administrators can do this for any and all users in the system, Administrators will only have access to the groups they have been assigned.
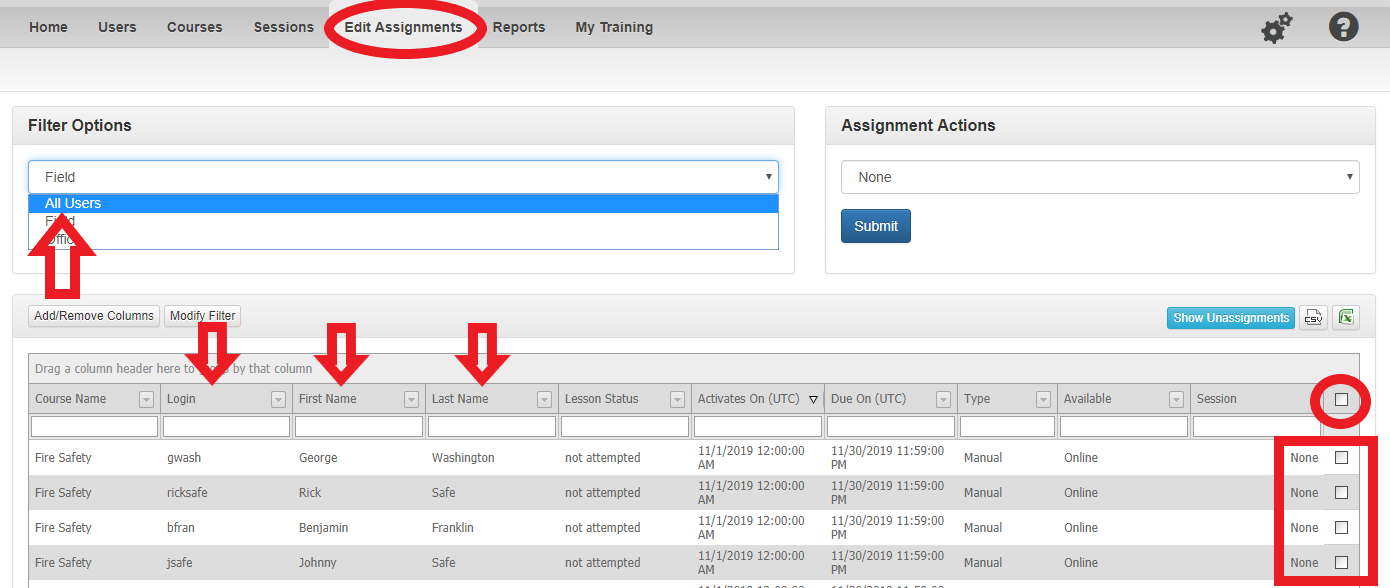
To begin, click on the “Edit Assignments” tab at the top. On this screen, you should see drop-down selections for “Filter Options” and “Assignment Actions,” as well as a table at the bottom of the screen. This table contains all assignments that have not yet been completed, for all users, and can be filtered using the column headers.

If there is a specific group you need to edit an assignment for, use the “Filter Options” drop-down to select the group. Or, if it is more specific, you can use the drop-down columns in the table to narrow it down by a single course, or by specific users using their names or login information. Use the check box on the far right of the table to select which line you need to edit, or the check box at the top right of the table to select all information in that page.
Once you have selected the assignment data you need to edit, use the “Assignment Actions” drop-down box at the top right of the screen to choose the action you wish to do. You can choose from:
“Unassign” will unassign the selected assignments from the selected users
“Change Assignment Dates” will allow you to change the assignment dates associated with the selected assignment for the selected users
“Email Sending Options” will allow you to alter the assignment emails that are sent to users for the selected assignment and users.
Please note: If the assignment is marked as “Auto Assigned,” the “Email Sending Options” cannot override the setting on the “Automatic Assigning” feature. Likewise, editing the dates on any automatically assigned courses will not prevent the course from automatically assigning again on it’s intended date. For questions about how auto assign works, please click here.

Once you have made your selection, hit “Submit.” A pop-up will appear, unique to the action selected, that will ask to confirm your choices. It will also detail how many “selections” have been made, so please ensure that number matches the check boxes you selected on the main Edit Assignments page.

Please note: if you have more than one assignment selected, the action will be completed for all assignments. By clicking “Continue” on the pop-up, the action will be completed for all selections, regardless if they are the same assignment or user or not. Please double-check that you are completing the action only for the selections you wish to edit. Once the assignment has been edited, the new information will appear in the data table below and you can continue to edit additional assignments.