Whether you need to supplement a course with a document, or simply store pertinent account documents within the LMS, certain administrators will have the ability to upload attachments into the LMS. For more information about user types and permissions please review this article: User Claims Explained.
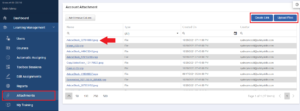
From the Learning Management section of the menu, choose “Attachments.” The table on this page will display any attachments that have been uploaded to the account.
There are two kinds of attachments you may choose to create: an external link or a document file. Please note, document files can be a variety of file types, the size of any file is limited to 100 MB. We apologize for any inconvenience this size limit may cause. An alternative to trying to upload large files as an attachment might be to create a SCORM course that contains the needed material. There is no size limit for a course created in the SCORM format. For more information on how to make custom courses for your account please see this article: Creating Custom Content for Your SafetySkills LMS Account
To create an external link as an attachment, click the blue “Create Link” button on the right. A pop-up will appear prompting you to name the attachment and insert the link to external content. Please note, the link will need to be a valid URL in order to save the attachment. Last click the “Create” button to save the attachment.
![]()
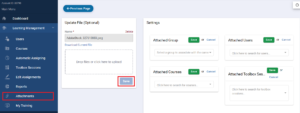
To upload a document as an attachment, click the blue “Upload Files” button on the right. A pop-up will appear that will allow you to drag-and-drop files into the box outlined in a dashed line, or click in the box to browse your computer to choose a file. Please note, once uploaded the the name of the document will match what was in your system. After you select one or multiple files, click the “Upload Batch” button.
![]()
Once you have successfully uploaded the attachment, it will populate in the table.
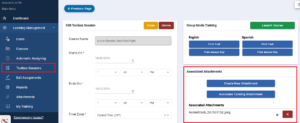
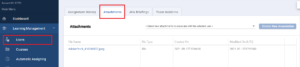
To edit the attachment’s settings, click on the name of the attachment within the table. This will open a new page that shows you:
- The group the attachment is associated with (if any)
- The courses the attachment is associated with (if any)
- The sessions the attachment is associated with (if any)
- The individual users the attachment is associated with (if any)
There is a green save option for each area of the system that an attachment might be linked to. To add or remove a group, user(s), course or Session make the needed changes and then click the save for that section of the page.
Also, on this page, you will also have the option to update the file or link path, if necessary. If you upload a new version of a file or if you update the URL click the blue “save” button to save the changes.
Now, you will be able to access the attachment within the LMS.
Attachments linked to a Toolbox Session will be visible to any administrator that can access the Toolbox Session’s details page.
If you associated an attachment with a group, or user(s) directly, the attachment will be accessible to the user on the My Training page in the “Attachments” section.

Also, if you associated an attachment with a group, or user(s) directly, your administration team, with permission to view the user edit page and Attachments, will see the “Attachments” tab on the user edit (profile) page. The “Attachments” tab will list all attachments associated to the user either individual or by a group selection.
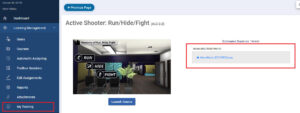
If the attachment is associated with a course the attachment will be accessible when viewing a course assignment on the My Training page.
User types with access to the course library can also review the attachments listed to a course from the course details pop-up.
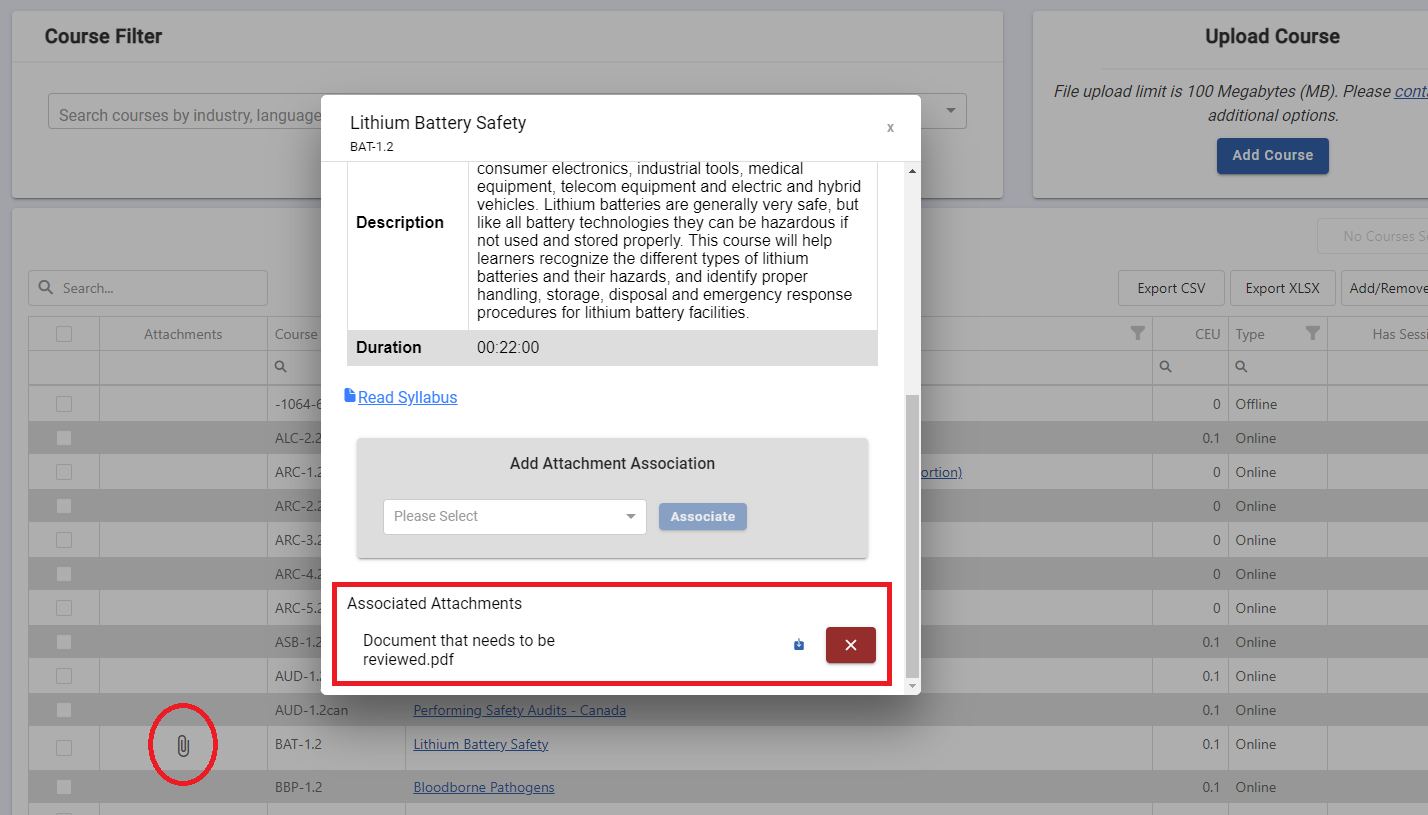
You also have the ability to associate attachments individually, directly from the course, user, or sessions page. To learn more about individual associations, please click How to Individually Associate Attachments. To learn how to create an assignment from an attachment, please review that article How To Create an Assignment From an Attachment.
For further assistance with attachments, please contact SafetySkills Help Desk by emailing support@safetyskills.com, or by calling 405-463-6656, option 2.