For information on editing data for existing users, please go here.
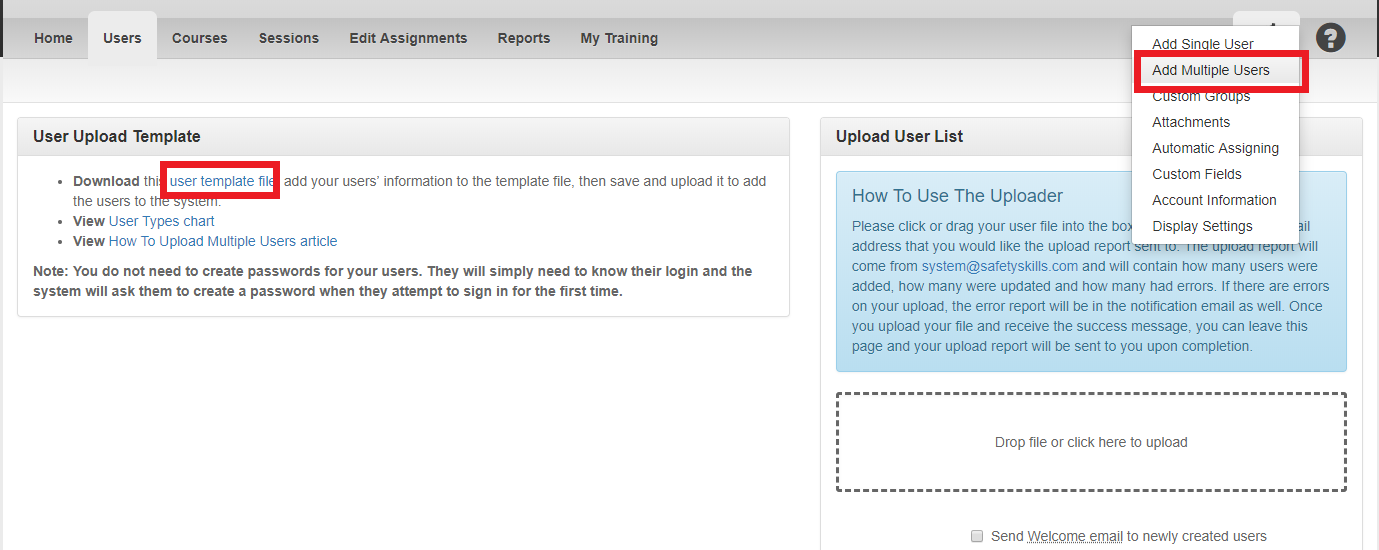
To get started, click on the “Configure” tab (looks like two gears) and select “Add Multiple Users” from the drop down menu. On the left side of the screen, you will see the option to download a “user template file”. You will use this template to update user information before saving and uploading the file using the same screen.
The user template file will export into Excel.
In the user template file, the User Type, Login, First Name, and Last Name columns, in addition to any required custom fields, must be present in order for the file to upload successfully. Other columns should only be present to update appropriate information. Please note: if a column header is present but the corresponding information isn’t, the information will be updated to be blank.
Due to the way Excel encodes dates, dates will not work when uploading an Excel file. The maximum length for any field is 100 characters, and accepted characters include:
- Letters (A-Z) (Not valid in Phone)
- Numbers (0-9)
- Spaces (Not valid on Login)
- Special Characters
- Email: `!&%^*-=~_+{}|’./?
- All other columns: `!&$%^*()-=~_+[]{}|’:,./<>?

There are six available user types (Column A) to choose from. You must use one of these six:
- Owner
- Super Administrator
- Advanced Administrator
- Administrator
- Report Administrator
- Learner
For a detailed list of the permissions for each of these user types, please click here or review the list by clicking the “User Type” link on the left side of the “Add Multiple Users” page.
A user’s login (Column B) must be at least three characters and unique to that specific user. You may use their email address as their login if you wish, as well as any combination of letters and numbers. If you use leading zeros for a login, please be aware that exporting the user list into Excel will clear the leading zeros.
PLEASE NOTE: Login IDs cannot be updated using the Multi-User Uploader, as the Login ID is the unique identifier for all users in the SafetySkills LMS. Attempts to update Login IDs using the Multi-User Uploader will result in errors or duplicate Learner profiles.
When entering their First and Last Name (Columns C and D), please note that however you enter the name is how it will appear in the system. For instance, “John SMITH” will appear differently than if you had typed “John Smith”.
You may choose to enter an email address for your users (Column E). This will allow you to send reminder notifications to them about upcoming or newly assigned training courses, as well as enable them to reset their password via email. However, you may not duplicate email addresses in the system.
The other columns pertain to creating and managing groups and custom fields for your users. To learn more about that process, you can go here and here.
When you have successfully completed filling out the template file, save the Excel sheet in the CSV (Comma Delimited). On the “Multiple Users” tab of the LMS, click “Choose File” to browse your computer and find your Excel sheet.
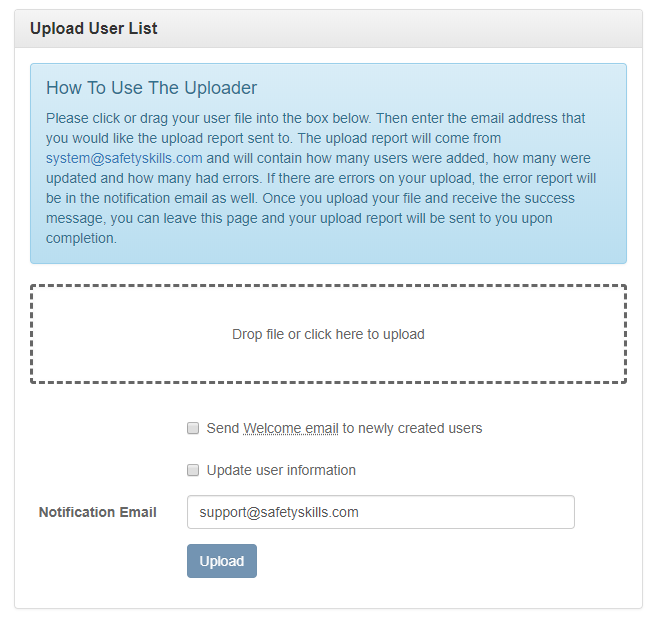
If you would like to send a Welcome email to the learners on the Spreadsheet, be sure to check the “Send ‘Welcome’ email to newly created users box. This will prompt the LMS to send a welcome email containing their login information to any newly created user with a valid email address.
If you have already added users to the system that are on your Excel sheet, be sure to check the “Update User Information” box so that the LMS knows to update existing user information. If you forget this step you will receive errors for the logins or emails that are already active in your account. If the login or email is associated with a user that has been deactivated, the error message will say, “This (____) is associated with an archived user. Please use another.”
If you would like the system to send your updated user report to a different email address, please enter the email address in the “Email” space provided. Upon completion of the upload, whether it was successful or had errors, the system sends a status report to the email listed. If the email should go to a different address, please enter a valid email address within the box. If you have any questions or need any help correcting the errors, please email the SafetySkills customer care team at support@safetyskills.com and include a copy of the error report you received so we can take a look and let you know how to resolve the errors.
Once you have selected your settings, you are ready to click the blue “Upload” button.